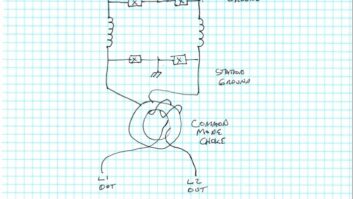
Fig. 1: Parts are laid out for the start of the big repair. I had an inquiry from our VP of programming concerning his office speakers. Were they blown? The JBL 4408s were his favorites; was there anything we could do?
Well, yes, there was something we could do: Replace them immediately with brand-new 4410s!
A perception that the larger speakers would sound better was perhaps not entirely justified (and they’re hungrier for power now); but it was an easy “sell” and a quick fix. And I used a Brother P-Touch labeler to create a position called “11” on his amplifier’s volume control. Suffice it to say that he was happy to get the larger speakers to debut new music ads on the station.
But back to the troubled 4408s.
Once they were in our shop, a little investigation revealed their real problem. The foam component surrounding the epoxy-impregnated speaker cone was completely rotted and required replacement. What had contributed to the foam’s early demise? I was unsure; but that particular speaker sat in direct California sunlight all day long on a credenza in an office with large windows. Its sister 4408 had been in a darker area in the PD’s office and showed no signs of early failure.
A little Internet research turned up SpeakerWorks.com (www.speakerworks.com), a supply house for DIYers that appeared committed to a high level of customer service, as evidenced by the detailed instructions supplied with each order. After prowling around the website for about 15 minutes I established that I could repair these woofers myself in our San Francisco shop for less than $11 per speaker.

Fig. 2: Removing the old foam surround can be a little intimidating. I ordered the parts recommended for JBL 4408A repair and moved on to other projects, thinking that it would be a week or so until I’d see the new surround and gaskets. Before my soldering iron could cool from another job in the shop the next day, my order had been delivered via Priority Mail.
Emptying the contents of the package onto the bench, I found two new surrounds and foam gaskets seen in Fig. 1, plus a small amount of the proper glue, small artistic applicator brushes and thoughtful step-by-step instructions, including a phone number for assistance if necessary.
AWAY WITH FOAM
I disassembled the woofer from the speaker cabinet. The SpeakerWorks.com instructions told me to remove larger pieces of surround foam with my fingers, and the rest using isopropyl alcohol and a cotton-tipped swab to soften the adhesive.
Some speakers also have a gasket over the top of the old surround, as the JBL 4408s did; a broad thin flat-blade screw driver was helpful in prying it away from the speaker frame.
The trick is to get the lip of the metal frame as clean and free of the old adhesive as possible. Use finger-held safety razor blades; cotton-tipped swabs as applicators to apply isopropyl alcohol to the old glue; and a 1-inch paint brush to tip the alcohol uniformly into nooks and crannies of the frame.
You enhance your chances of project success by preparing properly and thoroughly; this job was no different. Done in a well-ventilated and clean work area, this phase can be performed efficiently in 30 to 45 minutes. At first I worried that I might slice the speaker cone inadvertently with the razor blade; but as work progressed I established a systematic and progressive path around the frame, separating the old foam from the speaker cone.

Fig. 3: Clean surfaces are ready for test fitting of the new foam surround. SpeakerWorks.com is succinct about removing all of the old foam from the speaker cone, using the razor blade to slice it apart from the paper speaker cone if necessary. I found that using the 1-inch paint brush as an applicator for the isopropyl alcohol was helpful.
I focused on a quarter of the speaker frame at a time, developing confidence as I went. Working on a quarter at a time is necessary because the alcohol evaporates quickly, and the foam pulls away more effectively if it is still damp from the isopropyl application.
SpeakerWorks.com does state, “Rather than putting a lot of effort into removing the old material from the bottom of the cone in order to provide a clean gluing surface, you can install the new surround on top of the cone instead.”
TEST FIT
The next steps were straightforward.
I went over the edge of the speaker basket with a paper towel dipped in rubbing alcohol to remove as much of the loose surround material as possible.
Then it was the step I’d been waiting for, the test fit of the new surround before applying glue to any of the surfaces. For the surround to fit correctly, it must be in contact with the cone. In this instance I was fortunate. All went well and I determined that I could move forward with applying the adhesive supplied in the kit.

Fig. 4: Centering the speaker coil is important prior to gluing the outer edge of the surround. SpeakerWorks.com urges care in centering the surround on the speaker cone during the test fit. This assures that I would not be guessing about contact surfaces during the critical next step of applying glue on the surround and the speaker cone itself.
The glue is white upon application but dries clear. Still, the instructions recommend that you wipe off any excess. I took their hint of placing small dense objects around the inside edge of the cone, and temporarily used some 5/8-inch lag bolts we had in the drawer to ensure that the glued surfaces remained in contact and set up well.
The most critical part of the repair requires centering the voice coil properly. I practiced by pressing down near the dust cap on both sides of the speaker cone with equal pressure, making sure the coil was not scraping or making contact as it moved up and down, which it must do to operate.
This procedure is well described in the instructions, and through practice I was able to locate the sweet spot to apply glue on the surfaces to complete attaching the surround to the speaker frame. I again used the 5/8-inch lag bolts around the circumference of the speaker frame as pressure clamps to ensure that the mated glued surfaces remained in contact, and left it overnight to set properly.
Finishing this speaker repair required laying in a multi-piece gasket around the frame edge and gluing into place. It set up quickly within an hour, then I anxiously carried the speaker cabinet back to the bench to reinstall the woofer into it.
Within 10 minutes I had an older Crown D-60 amplifier, which I’d recently repaired, connected and driving test tones from our Audio Precision generator.
I wanted to ensure that the speaker moved easily and freely through its frequency range. I was impressed with the amount of movement the 40-ounce magnet induces into the assembly. The next test was with Carlos Santana’s“Evil Ways,”which always puts a smile on my face.

Fig. 5: The repaired woofer is on the left. PLEASED
I was pleased with how simple this procedural repair was. Now I am prowling our studios for wayward and tired monitor speakers.
SpeakerWorks.com carries speaker coils, frames, transformers and cones should you decide to be adventurous and try building your own creation. It also has a selection of repair surrounds and cones.
Perhaps you feel time management won’t allow you to take on something like this, but I disagree. After the initial cleanup of the old foam, this repair took about 15 to 20 minutes per day over about a three-day period.
In an age of slim engineering staffs, we often lose sight of the fact that there’s still a place for bench work. In fact I find it almost therapeutic, after hours at a computer working on spreadsheets and the latest compliance inventories, to do this work. The project doesn’t require extraordinary tools or knowledge, and SpeakerWorks.com provides helpful products and support.
This is an inexpensive bench repair that will place your prized monitor speakers back into service quickly and hopefully make you smile too.
Chuck Bullett, CPBE, is chief engineer for KITS(FM/HD), KMVQ(FM/HD) and KZDG(AM) in the San Francisco Bay area. His amateur call is W1AEK. Contact him at [email protected].