What got you into this crazy, fun business? While driving the other day I was reminded of a personal early motivator.
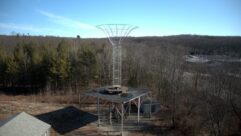
With the move by utilities to underground service distributions, you don’t see many aerial cable splicing tents anymore; but as a young boy, I watched a phone tech strap on his climbing spikes and belt and ascend the pole outside my house. He assembled a platform and tent and crawled inside.
As a little boy, I found this fascinating. I ran inside and ran a piece of string between the radiator and end table, and built a similar structure with my TinkerToys. A couple of tissues and tape completed my tent — and then I dispatched my plastic army men inside the tent to get to work.
What motivated you? Share your early experiences to me at [email protected].
***
David Wigfield is the technical supervisor for Entercom’s San Francisco cluster. He responded to our recent site inspection list discussion with a checklist of what his colleagues look for every week at the KCBS(AM) transmitter site in San Francisco.
On the way into the site, they check to make sure that the PG&E locks on all gates remain in place. Sometimes other tenants who use the road get frustrated and cut the locks out of the chain or bypass them. If they are bypassed, David or his staff makes sure they are added back in the chain.
David then looks at all four towers. This may seem obvious but don’t forget to look. Do they appear straight? The transmitter site is in a pasture; harvesters have clipped guy wires before.
Are all lights on? The site is 2 miles from an airport so they burn 24/7/365. If your site doesn’t have such a requirement, try an inspection at twilight so you can verify all tower lighting.
Are there new tunnels visible, burrowed by animals?
Next, check the generator building. Is the gen OK? Block heater? Any fluid drips? David checks the battery charger and battery connections. Also check the day tank for proper fuel level and any leaks. He opens and looks at the transfer switch. David has had MOVs across all phases and to ground. Are they OK? It’s usually obvious when they blow.
Outside, David checks all fuel lines coming into the gen building from the tank. Again, looking for damage or leaks.
David cautions us not to overlook the roof. They check the STL tower, the STL dish and its cable and connections. Review all other antennas to see if they look OK (no bent elements or bad connections or feed lines). Finally, don’t overlook the air conditioners and drain lines.
David walks around all four towers, noting any problems with the catwalks. As he walks, David checks the feedlines going into the tuning houses, looking for damage from expansion and contraction. He also inspects the protective tape, where the transmission is touching metal supports, to ensure it is still in place and has not fallen off or been eaten by critters, in addition to inspecting the feedline and conduit that runs along the catwalks. Are there missing supports and is anything sagging? Also make sure that the weeds are under control around the catwalks and the tower bases.
David also makes a visual inspection of the connections from the output of the tuning house to the tower, making sure lightning loops look ok and are not deformed from a strike.

While at the tower base, David checks the Austin Ring transformers for insulation problems. These transformers need to have new tape and silicon applied from time to time. Better to see it before it becomes a problem. Also inspect the tower base insulator for cracks or bullet damage. David then sights up two sides of the tower to see if it looks straight. After you have done it for as many years as David has, you can detect if the tower is out of plumb a bit. Finally, are the counterpoise screen wires OK?
David checks all tuning houses and ATUs, using a flashlight and looking at all the RF switches, coils, capacitors and arc gaps for signs of burning.
Also check all component standoffs for cracks, which could lead to arcing. Speaking of arcing, check any interface relay contacts visually for signs of arcing.
This next one, David says, he learned the hard way. He now looks at the solenoids on his RF switches to make sure one is up and one is down. Several years ago, they had a switch where the connection to the linkage that swings the contactor arm broke and both plungers were down. Come pattern change, the station was off the air. Speaking of the RF contactors, also look for any loose hardware around the switches that might have fallen off. Keep in mind that these switches vibrate at least twice a day, so hardware can loosen.
David writes that even though the inspection sounds long, once you get a routine established, the whole outdoor assessment takes about a half hour for a four-tower, 5 kW, two-pattern array. It would be a lot less if you only have one stick, but doing this has saved David and his crew many times. Plus, you get the advantage of what things look and sound like under normal conditions, which can be helpful if a lighting transformer is making more noise or some RF component decides to start talking a little louder than it should.
On behalf of Workbench readers, thank you, David, for the inspection suggestions!
Contribute to Workbench. You’ll help fellow engineers and qualify for SBE recertification credit. Send Workbench tips and high-resolution photos to [email protected]. Fax to (603) 472-4944.
Author John Bisset has spent 48 years in the broadcasting industry and is still learning. He handles western U.S. radio sales for the Telos Alliance. He is SBE certified.


