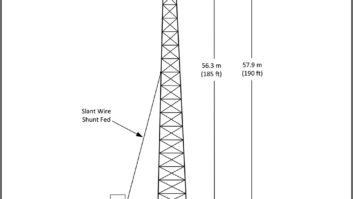
Marc Mann of San Diego spends a lot of time with electrical systems. He offers a caution regarding Ira Wilner’s story about driving a ground rod to sufficient depth.
Marc reminds us first to ensure that there are no utilities buried underneath. Driving anything of sufficient length into the ground falls under the category of “Call 811 Before You Dig.” In Marc’s practice he still hears news about competent contractors who have hit active high-pressure natural gas lines, electric or other utilities.
Marc was unaware, however, that in California, it’s the law (www.digalert.org/statelaw.html) to take this extra step of calling 811. If you don’t and accidentally hit a utility line, you could face a steep fine.
This service (and its equivalent in other states) is 100 percent free, for not only contractors, but for homeowners as well. Visit www.digalert.org/onecallsoftware.html. All it takes is a little planning. You may have to wait a few days for the lines to be marked, but the process can be a literal lifesaver.
Google “dig alert” to find the website for your state’s version of the service.
Marc figures that most Workbench readers are well aware of this procedure but it’s always a good reminder.
I’ve called 811 to identify cable locations in an AM directional field. In almost all cases, AC lines for the tower lights run in the same trench as the RF feeder, control and sampling lines. Once their underground location was spray-painted, I took a series of pictures, so future engineers would know where the cables were buried.
****
During a service visit for my furnace, the HVAC technician used a unique camera to peer inside to view the condition of the heat exchanger. It is made by Milwaukee Tool (www.cpomilwaukee.com). The company offers several models of digital inspection cameras.

Fig. 1: Milwaukee Tool manufactures a digital inspection camera. Shown in Fig. 1, the hand-held camera connects to the lens with a light via a flexible umbilical. The flex in the cable permits the camera lens to be turned to pretty much any angle, and you can view the image on a screen mounted on the hand-held body. Some models permit transferring the image via USB thumb drive.
Uses like peering around corners in a transmitter or underneath a tube socket come immediately to mind, but the umbilical cable is flexible enough to squeeze under the edge of a PC board mounted on standoffs, should you suspect a burned trace. At around $300, the price might be steep; however there are other less expensive brands in the $150 to $200 price range. Just Google “digital inspection camera.”
A word of caution: Some sites sell the camera body separately from the umbilical camera/light cable — so what looks like a good deal actually isn’t when you have to add the prices together.
****
Dallas special projects engineer Bill Ryan showed me an alternative to that digital inspection camera. It’s a JVC Everio series HD camera. Bill picked his up from QVC, but there are a variety of models for sale on the Internet for under $200, just search JVC Everio HD camera.

Fig. 2: A compact JVC model can be used for inspections. What makes this camera so useful is its compact size, shown in Fig. 2, and the rotatable viewfinder screen. You can hold the camera inside equipment, and rotate or invert the viewfinder screen so you can inspect nearly any problem at any angle.
Bill told me about a television transmitter problem that occurred at an unmanned site and had caused hours of fruitless troubleshooting. Bill mounted his camera on a tripod, capturing the transmitter meters, set the camera to “movie” mode and left the site. When the problem recurred, Bill watched the time-stamped video and quickly diagnosed the problem, based on the meter indications during the failure.
Bill’s model has image stabilization and a 40x optical zoom; it records on an SD card. Bill paid about $150 for his camera. Granted, the camera has no umbilical for peering into really tight places, like the Milwaukee does, but Bill’s camera is compact and at half the cost. It’s sure to do the job for most engineering challenges.
****
Inventor and broadcast engineer Joe Stack is always coming up with neat little products that fill a need for broadcast engineers and don’t cost a fortune.

Fig. 3: ACstate monitors the status of your AC. ACstate is the latest Stackley Devices product. It allows direct monitoring of an AC mains circuit simply by plugging the device in and connecting up the output barrier strip to the remote control status input.
The output is open-collector and will interface directly with something such as a Burk status input. As you can see from Fig. 3, ACstate is small and can be wired up with a screwdriver. The device provides galvanic isolation from the AC line, so it’s perfect for interfacing with a microcontroller or other low-level electronics. It will handle up to 25 volts / 50 mA max on the output terminals.
ACstate is distributed by Broadcasters General Store (www.bgs.cc).
Visit the Stackley Devices website for an introduction to the products Joe offers. Head to www.stackleydevices.com.
Contribute to Workbench. You’ll help your fellow engineers and qualify for SBE recertification credit. Send Workbench tips to [email protected]. Fax to (603) 472-4944.
Author John Bisset has spent 46 years in the broadcasting industry and is still learning. He handles West Coast sales for the Telos Alliance. He is SBE certified and is a past recipient of the SBE’s Educator of the Year Award.