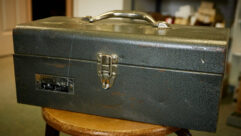
(click thumbnail)Fig. 1: A $20 Husky case, complete with dividers.Spring, at most stations, brings the start of another remote season. Engineers in warmer climes haven’t even had a winter break like the rest of us.
In preparation for what will be a good nine months of moneymaking for your station, it’s time to get organized.
Where to start? Get rid of the cardboard boxes or corrugated postal mail containers that hold your remote gear. A floppy cardboard box sends the wrong impression to the client. Further, a mish-mash of wires and AC cables makes setup a nightmare.
Lamar Smith is market engineer for Entercom’s Scranton, Pa., cluster. He and five other engineers keep transmitters, studios, IT and remotes running smoothly. His engineers are known for coming up with unique, cost-effective solutions to everyday problems. Their solution for remotes is a case in point.
Engineer Bob Drazba loves Home Depot, where there’s always something cost-effective that solves a problem around the stations. Home Depot is where he found a neat little tool case, shown in Fig. 1. For $19.95, Bob realized he had a solution to the cardboard boxes.
It’s amazing what 20 bucks will get you these days: a sturdy plastic-and-metal-trimmed case, with a tool pouch, dividers and even a webbed shoulder sling. The case is versatile, too.
The dividers can be used in the basic case to hold a wireless microphone system, as seen in Fig. 2. Note that Bob has color-coded the wireless systems with colored electrical tape. No questions about which microphone belongs to which receiver. Bob has carried the color-coding to the case itself; the orange wireless goes into the orange case. Hey, anyone can figure this out!
There’s even enough room for spare batteries in these Husky cases.
(click thumbnail)Fig. 2: A full wireless microphone system fits in this standard case.
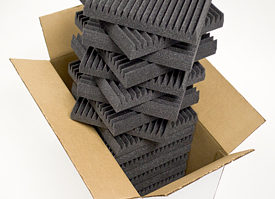
Bob took the storage idea a step further, cutting out foam inserts for specific pieces of equipment, like the Comrex in Fig. 3. You can buy the foam from a packaging, hobby or office supply store and customize it for your equipment. Bob’s thinking is that if everything has its place, in most cases it returns as it left.
Simplifying things for staff will make your life easier, too. Color-coding – even the input pots on the Comrex – means fewer foul-ups on live radio.
It doesn’t take a lot of time to implement a plan like this; and the payoff is time saved for you. Wouldn’t it be nice at the next manager’s meeting to have programming and promotions compliment you instead of carping about missing cables when they set up a remote?
Bob and Lamar told me that under the old method of remote equipment organization, it sometimes took them a couple of days to organize equipment and cables for a remote. Digging through several cardboard boxes was the norm. This led to frustration, since during the warmer months, the engineers were handling up to three remotes per station over a weekend.
Now, thanks to these cases, they can take a quick look inside to assure everything is in its place, and they’re off to the site. Fig. 4 shows a few of the cases lined up and ready to go.
In addition to the colored electrical tape bands, mark the bottom lip of each case. Bob has also used a P-Touch Labeler to identify each case – RPU, Comrex, wireless and the frequencies used.
Thanks to the Entercom Scranton team for sharing their ideas.
(click thumbnail)Fig. 3: The foam cutout holds WILK(AM)’s Comrex.
If you run into trouble getting the $20 expenditure past your manager – yes, there are managers who would question the expense – ask if he thinks the client would pay more for a remote at which the engineer showed up with a cardboard box held together with duct tape, or a remote run out of shiny, well-organized cases. If he’s sharp, he’ll get the idea (or he may tell you to get some new cardboard boxes).
***
I have received comments about the solenoid breaker reset scheme described in the Feb. 1 Workbench; I’ll share them in a future column.
Brian Brachel’s response, though, offered very good tips on what’s really causing the trouble. He is the chief of WKHQ(FM) in Charlevoix, Mich. The station serves the Traverse City market, where there’s great fishing and other sports.
While Brian applauds the engineer’s design of a solenoid-resettable breaker, he adds that with the same or less effort, the engineer could have found the actual reason that the circuit breaker was tripping.
Brian had a similar issue with a Continental 816-R4 a few years back. He would experience plate breaker shutoffs for no apparent reason every month or so.
Brian investigated the breaker and noted that it was 90 amps, as installed by the factory. The breaker was original equipment.
One day Brian decided to figure out what was going on. He measured the current through the breaker with an RMS ammeter. At 100 percent transmitter power output, the transmitter was drawing 88 amps through that 90 amp breaker! This of course was the issue, and here’s why: When the building got warmer, the breaker would de-rate and would trip.
Brian’s next call was to Continental, who told him that there should be a 100 amp breaker in that circuit, if he was drawing 88 amps. They sent a 100 amp version that would fit. The result: not one trip since.
(click thumbnail)Fig. 4: Color-coded remote cases are ready to go. Sure looks professional, doesn’t it?
With this resolution, Brian offers several suggestions.
First, if the building is hot, cool it off. Remember that everything gets de-rated in heat. That includes line fuses as well as circuit breakers. Heat could eventually cause other breakdowns as well.
Second, make sure all three-phase connections are tight. If they are loose, they will create heat, which will propagate through the assembly and create the same result in the breaker before eventually burning the connections.
Third, when you suspect a faulty breaker, measure the current with a calibrated clamp-on ammeter. RMS meters will measure the AC circuit accurately. Make sure the phases are all in balance – close to equal current draw on each phase leg. This measurement will tell you a lot about the circuit’s operation. It could be a wrong value breaker installed, as was Brian’s case, but it could also be a power supply problem or a heating issue.
Ammeters are just as important as a high voltage probe and a good voltmeter. For broadcast and contract engineers, at a minimum, these three pieces of test gear are mandatory.
Finally, chronic tripping usually indicates a problem. Spend your valuable troubleshooting time trying to find the root cause. Band-Aids eventually will fail and you will be back to square one. Thanks, Brian, for these great troubleshooting tips.


