Like most of us during what advertisers like to call “this difficult time,” I was compelled to spend a fair amount of it “working” from home.
Truth be told, I hadn’t worked so hard in years. My wife kept me so busy with household projects that I was begging to go back to work just to get some rest!
But there were the inevitable frequent bouts of boredom. I often found myself at my workbench, staring at the various boxes and bins of parts, wondering what I could do with them.
Fortunately, my wife had given me a copy of “Designing High-Fidelity Tube Preamps” last Christmas. (Yep, she’s a keeper!) The book is by Merlin Blencowe, known on the internet as The Valve Wizard. It’s a rather ponderous tome for a guy like me who barely passed Algebra; but it’s loaded with lots of great design ideas.
One chapter toward the back discusses a transformerless headphone amplifier built around a White cathode follower tube stage.
As I rummaged through my parts stash, I came across some spare tubes and decided to issue myself a challenge: Could I build a working vacuum tube headphone amp with only the parts I had on hand?
Breaking the Rules
With Blencowe’s text as a starting point, I then stumbled across a similar design by Pete Millett. His design was a bit more complex and included some high-end output transformers. It had been reworked by another fellow DIYer, Ian Thompson-Bell, for use in his tube console.
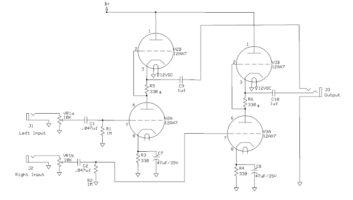
Ian has been very helpful to me with past tube projects, so I had a good look at that.
Eventually, I came up with a schematic, shown small in Schematic 1. You can obtain the schematics for this story by emailing [email protected], with “Curt’s schematics, please” in the subject line.
When you look at the schematic you’ll see that it breaks a few design rules. Remember, it’s based on what I had, not what I wanted!
Normally, no one in their right mind would build such a thing using 12AX7s, which are normally used as high-gain preamps (especially guitar amps). Obviously, the high impedance of the output would have a hard time driving a typical pair of headphones.
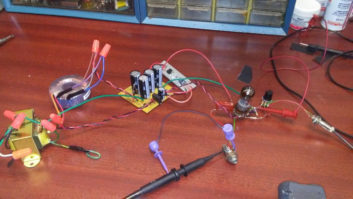
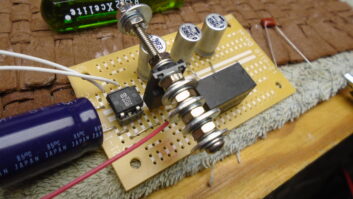
Still, I soldiered on, slapping it together with a power supply I managed to assemble. See Picture 1.
I was amazed it actually passed audio, but not surprisingly, the output was anemic at best.
I went ahead and added an input stage based around two halves of another 12AX7, one for each channel. (I have no idea how I acquired so many spare 12AX7s. If I didn’t know better, I’d swear they were breeding!) See Schematic 2.
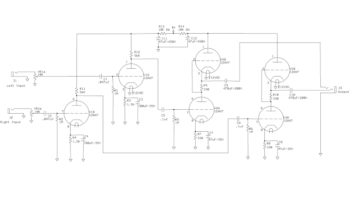
The input stage is a very common design, seen in numerous mic and instrument preamp stages. The plate resistors could stand to be larger, but I happened to have a pair of large 56 kohm resistors.
What I didn’t have was a stereo pot for the volume control, so I had to substitute two regular 10 kohm pots and adjust each channel separately. The coupling capacitors on the inputs are an oddball value, because, again, they’re what I had.
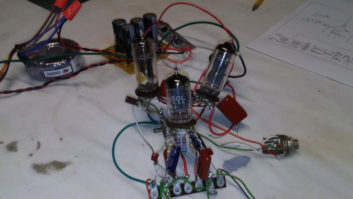
Other designers vary the value of the cathode resistors on the output stages anywhere from 160 ohms to 470 ohms. I had a few 330 ohm resistors on hand, so we land somewhere in the middle. I found a couple solder lug strips to make the point-to-point wiring a little neater. See Picture 2.
This version passed much more signal, owing to its nearly 60 dB of gain. That’s clearly overkill for a headphone amp, but it was able to drive a pair of AKG K240 headphones. This was likely due to sheer brute force, as the impedance mismatch would make any proper designer’s hair stand on end!
A colleague suggested much larger electrolytic capacitors for output coupling to handle that a little better. The closest thing I had was a pair of huge 470 µF/200 V power supply caps.
The 12AX7s on the output certainly gave it some “crunch” at higher volumes. If you’re going for a “tube” sound, I suppose it would work.
The power supply was put together using some parts I had stripped from an old tube project I was no longer using. The supply design is lifted directly from that project.
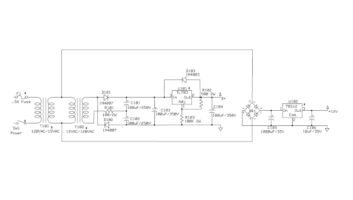
It’s fairly simple as tube supplies go. I suppose I could have gotten away without the TL783 regulator for the plate supply, but it was handy. In fact, it was already bolted to a heat sink with a 78S12 regulator that I could use for a nice, clean, DC filament supply.
I mounted the other components to a piece of perf board. I didn’t have a 100 ohm 2 W resistor, though; so I had to connect a 47 ohm and a 56 ohm in series. Close enough for rock and roll.
See Schematic 3.
Ideally, the output tubes would be 12BH7s, which are common in this setting.
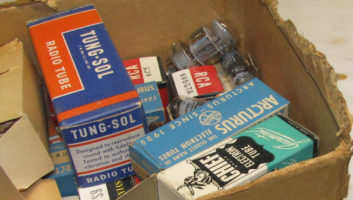
Wouldn’t you know it? I came across a box of old radio tubes, and buried under the pile were two 12BH7s! Amazingly, they both still worked! They also happen to have the same exact pinout as a 12AX7, so no rewiring was necessary.
Granted, they were mismatched, which led to one channel being slightly louder than the other. I also found out the hard way that those tubes get HOT when working. I’m told this is normal.
So now I had a working device, but it was a terrifying looking pile of parts on the workbench.
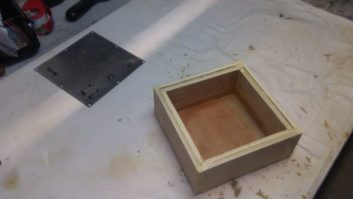
I set about constructing a proper enclosure for it. I had recently built an equipment rack for my studio using a sheet of cabinet-grade birch plywood. I used some scraps to assemble a small box.
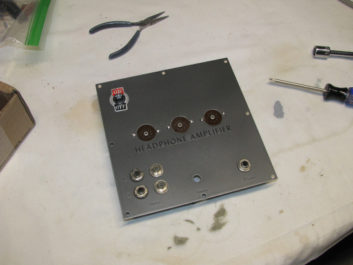
Digging through a storage bin, I found a few square metal plates someone had given me years ago. Hated to just toss them … (I swear, I’m not a hoarder!) One of these plates would be perfect for a top panel for the jacks, tube sockets, and such. See Picture 3.
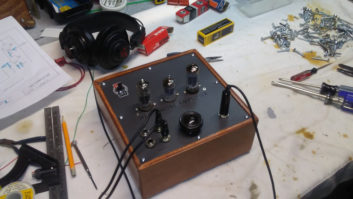
A little punching and drilling, a coat of Testor’s model paint, and some lettering, and the panel was done. Some stain and a coat or two of polyurethane, and the box was completed. See Picture 4.
I managed to fit everything inside, which was a surprise, considering I simply based the size of the box on the dimensions of the metal plate (about 7 1/2 inches square), and how much scrap wood I had.
I decided to mount the tubes on the outside, mainly for the coolness factor; but also for the other coolness factor, as in keeping the 12BH7s cool. This definitely gives it an antique vibe.
The finishing touch was a Bakelite knob from a stash of old radio knobs an even older friend gave me years ago. See Picture 6.
So, it works, if only barely.
What improvements can be made to the design without breaking the bank and reinventing the wheel in the process?
For starters, I will likely order a matched pair of 12BH7s. Some of the output transformers I researched gave me sticker shock, but Ian Thompson-Bell suggested a pair of Edcor XSM Series transformers.
They are very reasonably priced, just under $20 each, and could be bolted to the top of the enclosure, behind the tubes. They would eliminate the giant coupling caps, which would then be replaced with much smaller 1 µF polyesters.
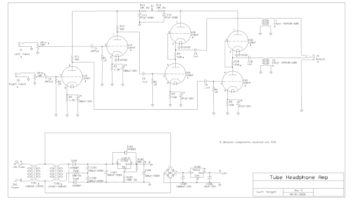
I’d also replace one power transformer with a toroidal type, to match the other one. Then, in the interest of neatness, I might go to the trouble of designing a PCB for the rest of the circuit. See Schematic 4.
But, for something thrown together with what was on hand, it was a fun and interesting project and a great conversation piece.
Curt Yengst, CSRE, is engineer for Lighthouse TV in Allentown, Pa., and a longtime RW contributor.
Email us with your own DIY ideas at [email protected].
