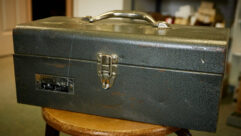
Fig. 1: Take the mystery out of how much wire is left in the box.
Friend Weller, formerly of KVNU(AM)/KVFM(FM) and now CE at Utah Public Radio — home to KUSU(FM), KUSR and 29 translators — is no stranger to Workbench.
He writes with a practical tip. Recently, he had to find out how much Cat-5 shielded cable was left inside two spool boxes like the kind shown in Fig. 1.
This required him to lug the boxes out to the big grassy area south of the station, then haul a bunch of the cable out to see if he would have enough to do these two lengthy wire runs. Nothing worse than not having a wire-stretcher handy while you are on the tower or crawling above the ceiling tiles!
In the process of spooling all of the cable back into the box, he came up with a plan to help you avoid this dilemma.
The next time you buy a new reel, look for the footage marked on the cable jacket, as seen in Fig. 2. Find that first footage number near the end of the wire, then write it down on the outside of the box, as shown in Fig. 3.
Then, at any time, you can know how much is left on the spool just by using simple subtraction (or addition), without having to worry, guess or hauling it all out.
Friend cautions, however, that the larger number can be at either end of the spool, so adjust your mathematical method accordingly. Also, make sure that you are looking at the footage and not the manufacturer’s date or factory coding.

Fig. 2: Note the ‘foot’ indication, imprinted on most cables. Alternately, if the wire doesn’t have the footage printed on it, you could keep track of the length used over time and note it on the box as well.
The point is that a little effort up front will save you a lot of effort later. Thanks to Friend Weller for helping to make our lives more efficient.
* * *
If you don’t have storm emergency kits at each of your transmitter sites, now is a good time to put them together.
You’ll want a sealed container, like those $5 plastic bins you find at the discount stores. Size depends on where you are and what kind of emergencies you expect. Getting stuck on top of a mountain for a few days requires a different set of items than if you’re stuck for just a few hours closer to civilization.
First on your list should be a first aid kit, followed by a couple of flashlights and fresh batteries. Fresh water and some granola bars, chocolate and other foodstuffs make sense. Include a roll of toilet paper and paper towels, and perhaps a dispenser of waterless hand cleaner.
Make a copy of all emergency numbers and place that list inside the container. Don’t forget to include the address of the transmitter site as well as the site phone numbers. Also include contact numbers for your utilities: electric, water, sewer, gas. If you have a generator on site, include the emergency numbers for the repair service as well as your fuel provider.
Let me know if there’s a glaring omission to the must-have list.

Fig. 3: Simple math tells you what’s left inside. You can add a variety of other supplies as you see fit. Additional items might include a wool or thermal blanket, hand warmer, a whistle, a couple of light sticks, a few garbage bags, a supply of Ziploc or similar brand storage bags, pencil/pen and notebook, duct tape, a multi-function tool, some gloves, cutlery and a shovel.
If you’re short on time, head to this Web site: beprepared.com. Emergency Essentials not only offers a variety of emergency kits but also interesting preparedness articles. Click on Insight Articles from the home page.
Thanks to WBQB(FM)/WFVA(AM) Engineering Manager John Diamantis for adding suggestions.
* * *
Consulting Engineer Bob Culver of the firm Lohnes and Culver encountered bearing problems with large fan motors like those mentioned in the June 3 Workbench.
Bob writes that replacement ball bearings sometimes look good but do not last and appear to be very skimpy on lube in those “permanently lubed/sealed” bearing assemblies. He uses a small syringe and needle to get some additional lube under the lip of the seal (or through a rubber seal).
What to use? It needs to not dry out and must be able to flow slightly to redistribute itself onto the raceways when the motor is off.
Bob has had good luck with two types of lube: Chain saw bar nose roller bearing lube and snow blower auger gear case “liquid grease” lube.
These are both semi-liquid greases with slightly tacky texture. You don’t need much, but enough to coat all the bearing surfaces effectively. Don’t worry about using too much; excess will just leak out.
If you have a source of syringes you’ve won half the battle. They should be small, with a fine needle to get under or through the seal. Remove the plunger and place some grease in the rear opening of the syringe on one side, and let it flow toward the front as you add more grease but not covering the output end.
Start the plunger into the syringe and invert it (tip up) so that pressing the plunger sweeps the grease forward and expels the air. You will wind up with about 1/3 capacity of only grease (not air) in the syringe, depending on your skill at filling the syringe.
You will also know exactly how much lube you inject into the bearing with the graduated syringe.
With bigger syringes and the proper oil, this process also works well to oil blower motors that require periodic oiling. When they call for “1/2 ounce of oil every five years,” for example, the graduated syringe works well. Just use a larger one with flex tubing on the output to reach those hidden oil points. With this you can detach the tubing and just draw the oil up into the syringe before applying.
Contact Bob Culver at [email protected].
John Bisset has worked as a chief engineer and contract engineer for 39 years. He is international sales manager for Europe and Southern Africa for Nautel and a past recipient of the SBE’s Educator of the Year Award. Reach him at[email protected]. Faxed submissions can be sent to (603) 472-4944.
Submissions for this column are encouraged and qualify for SBE recertification credit.


