Fig.1 – Dismantling the glove compartment cover and the original head unit.
BERGAMO, Italy — Widespread in-car listening is crucial to the success of digital radio.
While an increasing number of new cars are now equipped with a digital radio, retrofitting existing cars is still an important issue.
There are various ways to do this. One can, for example, replace the entire head unit, or simply add an external receiver attached to the windscreen, or connect a “black box” DAB/DAB+ tuner to the existing head unit (perhaps hiding it in the glove compartment).
THEORY
The first option is the most expensive, especially if the car is factory-fit with premium CAN-bus-controlled Navi and sound systems, and it’s not exactly as “plug-and-play” as one would expect.
Even for those who choose to skip the occasionally used L band frequencies (1452.960–1490.624 MHz), standard factory-fit antennas and/or antenna amplifiers cannot properly handle band III signals (174.928–239.200 MHz) because they generally function as an open circuit for the RF signals. Thus a new antenna — windscreen or rooftop — is required.
Those who opt to replace the entire head unit usually require the highest level of integration to avoid any “extra” visible items inside and outside the car. Replacing the original antenna with one that is band III-capable is more tedious — and more costly — but it will result in what appears to be a factory-fit model.

Fig.2 – The DAB+ tuner central unit is to be fit to the bottom of the dashboard. The second option, which consists of adding an external windscreen-mounted receiver, is generally the most affordable and easiest way to retrofit. Take for example the portable satellite navigation system, which is powered from an in-car socket and has a removable windscreen mount to hold it while driving.
This add-on unit receives digital radio stations and transmits them to one’s car radio on a free FM frequency (provided this is legal in one’s country of course) or to the aux-in port (where available) through a wired connection. Some models feature internal batteries, so one can even take them from the car when the journey is over and carry on listening using headphones.
So what are the cons? It’s necessary to connect an external antenna (usually on the windscreen) to ensure proper reception outside top coverage areas, and the interior of the car will then house extra connection cables and a suction-cup holder — not the most attractive, though certainly effective.
OTHER CONSIDERATIONS
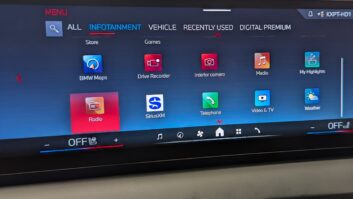
As regards the third, black box solution, various configurations are possible, depending on the way one wants to control the additional DAB+ tuner and how the sound is sent to the existing head unit. For CAN-bus-equipped vehicles, specific adapters allow the user to control the DAB+ receiver using factory-fit steering wheel controls for tuning, preset selection and volume adjustment. With this option, nobody can tell the car has been retrofit. Other vehicles can use a black box tuner with an external control panel equipped with an LCD display, rotary knob and keys. Effective, possibly nice, but visibly retrofit.

Fig.3 – The Windscreen Film Antenna Vehicles with a head unit that features an aux-in interface placed in a convenient place (e.g. inside the glove compartment) can receive the sound signal from the DAB+ tuner via baseband analog audio, otherwise a built-in FM modulator will convey the digital sound to the existing FM tuner.
Choosing the proper way to feed the digital sound to the head unit definitely makes a difference. In FM broadcasting, the signal is transmitted as baseband audio in the range of 30 Hz to 15 kHz. That is to say, even the best FM tuner has a frequency response limited to 15 kHz. Further, stations broadcasting in stereo insert a 19 kHz pilot tone to “tell” the receiver that stereo mode is available.
As a consequence most (not all) FM tuners use some type of filter that rolls off audio response rapidly above 15 kHz to keep the 19 kHz signal out of one’s system. On the other hand, DAB+ frequency response can span across the entire audible band, thus ranging up to 20 kHz or higher. When listening to a good broadcast through a decent sound system, anyone will immediately notice the difference, and audio enthusiasts can’t help but choose a wired aux-in connection.

Fig.4 – The final check before reassembling the dashboard. No matter the configuration, the black box solution requires an additional antenna to properly tune digital programs. Complete integration and product cost of the black box solution is between that of replacing the entire head unit and installing a windscreen receiver.
PRACTICE
In a practical experience, a hi-fi integration specialist retrofits a car using an economical solution with no compromise on sound quality. He installed a black box with its own control panel (no integration with steering wheel controls), connected to the vehicle’s sound system through a dedicated aux-in port.
The car in question, a Peugeot 407 Estate, features a multimedia unit inside the glove compartment (which includes an aux-in port) and a major challenge. Standard external antennas need a ground plane to work properly. The Peugeot 407 Estate features no metal part on its roof — its magnificent panorama roof consists of a single slice of tempered glass, extending from the windscreen edge to the back of the car.
The glass stops 20 centimeters before the rear window. That 20-centimeter stripe is made of plastic, so the integrator had to carefully choose the antenna type and position.

Fig.5 – The O-overall A-appearance During a Test Drive The first step was to disconnect the car battery, then dismantle the glove compartment cover and take apart the factory fit sound system control panel, from which the DC power that feeds the DAB+ tuner is drawn. The retrofit tuner features a central module, which the technician decided to hide on the bottom of the dashboard, close to some HVAC ducts.
The final choice for the antenna was a windscreen mounted film antenna and the DAB tuner control panel was installed under the main display, using an empty space on the dashboard.
The baseband audio cable was then connected to the multimedia interface inside the glove compartment and the proper operation of the system was carefully checked before reassembling the dashboard. The entire operation took approximately 90 minutes. Zanetti Hi-Fi in Bergamo, Italy carried out the installation.
Davide Moro reports on the industry from Bergamo, Italy.