The end of summer is a great time to wrap up outdoor projects.
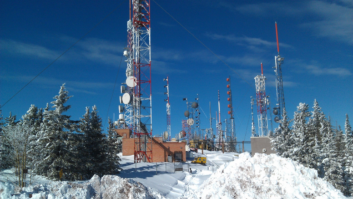
Over the last few months I’ve gotten more than a few inquiries about improving station ground systems. John Huntley, engineering manager for the Cumulus stations in Rockford, Ill., took advantage of the warm weather to update his; he snapped pictures and shares them here.
Ground rods — or, more properly, “grounding terminals” — provide an electrical earthing (connection to earth) terminal for towers, building electrical feeds and studio ground references. There is a minimum standard for a building electrical grounding point, which can be found in the National Electric Code. Supplemental electrodes are allowed and nearly always helpful.
Often, effectiveness is stated simply by the resistance of the connection to ground; the closer the resistance to zero ohms, the better.
Grounding rods are the most common terminal and come in various sizes and types. Common lengths include 8- and 10-foot; common diameters are 1/2-, 5/8- and 3/4-inch.
Rods are available in brass (costly), stainless steel (also expensive), copper-clad steel and tinned steel. You can find the latter two at many hardware stores. Copper-clad steel is most common, seen in Fig. 1; the steel is for strength, the copper for corrosion prevention.
A number of companies make these rods. Two are Erico and Harger. Many broadcast equipment vendors sell Harger products. John buys his rods — usually copper-clad 5/8-inch by 8 feet — from Grainger or local hardware stores.
Grab your driver
Longer rods screw together or use compression fittings. Where John works in the Midwest, he was able to get down an impressive 24 feet, in order to hit the water table.
Driving the rods by hand will give you quite a workout. If your site is new construction and a backhoe is available, set the rod and let the backhoe cowboy gently drive it with the power equipment. Otherwise, use a fence post driver, as seen in Fig. 2. These are readily available at local and big-box hardware stores. They are heavy enough to drive the rod quickly. The fence post driver has an open end; the opposite end is capped. It is slipped over the ground rod and the two handles are grasped with a downward motion. The weight of the driver, combined with the force exerted, drives the rod into the ground.

(L – R) Fig. 1: This copper-clad steel rod is used for grounding; Fig. 2: Insert the rods with a fence post driver, like this one; Fig. 3: With a hand sledge, drive the last foot or two into the earth; Fig.4: A drive cap prevents the end of the ground rod from mushrooming.
When the post driver is against the ground, John changes over to a hand sledge (Fig. 3). Be cautious here because of the risk of “mushrooming.” Although he has never damaged the end of a rod using a post driver, he has mushroomed many using a hand sledge. Buy a drive cap that slips over the end of the rod to prevent damage (Fig. 4). Buy several and use them. When you’re done setting the rod, your drive cap will be mushroomed but the end of the rod will not.
You can also find driver bits that will fit larger rotary hammer tools. Use ’em if you got ’em.
If you’ve forgotten drive caps, make sure that you have a good rough file to abrade the mushrooming of the end of the rod. If you are using a ring clamp to connect a wire to the ground rod, you will need to file the rod end close to the original diameter. The same is true if you are cad welding to the end of the rod, which we will describe shortly.
John sets the rods 8 to 10 feet from the base of the tower. Three rods in a triangle is a start. We are talking about providing a path for lightning current into the ground. A rule of thumb is that they should be no closer than twice their length. One reason for the triangular pattern is to keep the tower base pier or slab from being the only path to ground for a lightning strike.
Also install grounding leads from your guy wires at the anchor points. This added ground will divert any discharge to the ground rod rather than through the anchor pier itself.
John selects a flat copper strap to connect to the ground rod; he recommends 1-1/2 inches width at minimum. A strap has a large ratio of surface area to volume; the greater the surface area, the better. If not a strap, select #4 or #6 bare copper stranded (seven-strand) wire (Fig. 6).
John specifies copper for a simple reason: Aluminum quickly develops a copper oxide outer layer, and the effective resistance rapidly increases. Save yourself the headache and use copper for grounding leads.
As for making the connection, never use soft (lead) solder. Not only will it rot within 15 years, it may melt away even sooner (tomorrow?) in a lightning strike. Once the connection has melted, it may not be nearly as effective as it was. The next strike will go through your equipment rather than the now-damaged soft solder ground connection. Acid core will fail even sooner! Plus it will begin to eat away the copper.
Make the connection
Before you start silver soldering or cad welding, you must have a fire extinguisher or a full bucket of water on hand. This is particularly important when working outside in summer or fall. Dry grass burns quickly. If you can’t stomp it out immediately, use the extinguisher.
Remember to clear a space around the area before you start work.
Two points to remember when soldering to copper: First, copper is a great conductor and carries heat very well. Second, it will remain hot longer than you think.
An alternative to silver soldering is cad welding. This exothermic welding provides a controlled burn that generates a white-hot heat to weld the metal pieces together. A cad weld ready to fire is seen in Fig. 7.
Keep in mind three things when firing a cad weld: First, it will produce sparks and a plume of smoke, so step away. Second, don’t look at the charge; it will be very bright. Third, it will remain hot much longer than you think.

(L – R) Fig 5: This copper-strap clamp secures the strap to the ground rod; Fig. 6: Seven-strand copper wire can be used as a pigtail; Fig. 7: This cad weld is ready to fire; Fig. 8: Use a stainless-steel wire wheel to clean the strap before soldering.
John has, at times, silver soldered a copper strap directly to the driven rod. It will take time. The rod must be hot enough for the silver solder to wick to it.
You do not want to solder in wind. The wind will pull just enough heat from the rod or strap to make a good connection difficult.
John recommends using a turbo-torch with MAPP gas, which burns hotter. The silver solder itself is $70 for a one-pound tube of sticks. Expensive, but not a point to scrimp.
Other tools include a set of welding leather gloves and multiple needle-nose vise grips and/or C-clamps. Tight connections require less silver solder.
A clean surface is important. John uses a battery-powered drill and a stainless steel wire wheel (Fig. 8) to clean the area of the strap or straps.
(Although a stainless steel wire wheel is harder to find, they are available at Grainger. When you use a regular steel wire wheel to clean the copper, tiny fragments of steel are left embedded in the soft copper strap; these make it harder for the silver solder to bond to the copper. Also the steel may rust later, making the connection less effective.)
For further reference, John suggests the websites of Erico/Caddy, Harger Lightning and Grounding and www.amgroundsystems.comAM Ground Systems.
Adding additional ground rods takes time, but you’ll be impressed with the payoff.
John Bisset marked his 40th year in radio in broadcasting recently. He is a past recipient of the SBE’s Educator of the Year Award. Reach him at[email protected]. He can be reached at (603) 472-5282. Faxed submissions can be sent to (603) 472-4944.
Submissions for this column are encouraged and qualify for SBE recertification credit.