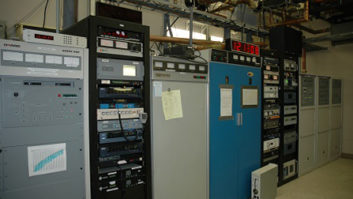
In this series, weve discussed whether an old transmitter was even worth fixing, followed by some techniques I’ve used to repair high-voltage power supplies; analysis and repair of control circuitry; and analysis and repair of the final amplifier input circuit. We’ve now reached the amplifier’s output deck.
If you are not working directly in the socket, cover it to keep screws, nuts and washers from falling in, which could make for a bad night. As I wrote previously, working with transmitters that use any kind of high-voltage (whether AC or DC) is inherently dangerous. Never work on transmitters when alone or tired. Take every precaution, and then take every precaution again.

At this point, you should be reasonably certain that the circuitry described in the preceding installments is functional. You’ll never be 100 percent sure, of course, until you have the transmitter up and running normally.
There are more similarities than differences, from transmitter make and model to transmitter make and model. I can’t describe the work you could have to do on every single transmitter out there, of course, so I need to emphasize common elements. Most of the problems you will encounter are not make/model specific anyway.
CLEANING AND MECHANICS
The first thing to do is to make sure the output side of the amplifier is clean, with all particulate matter removed. If you have not done this before, note that cleaning fluid used to remove “stuff” from the inside of the transmitter should a) evaporate quickly and b) not leave any residue. For this purpose I generally use isopropyl alcohol.
Be sure that all mechanical adjustments actually respond to their front-panel controls. These could be gear-driven, or motor driven; in either case, test them and don’t bother going on until they’re working.
In my work with transmitters I have found a lot of the silver coating on parts in the output network is tarnished. I have never encountered any issues with tarnish. Do not use any harsh methods to remove it; in other words, don’t use anything like sandpaper (even fine-grit) in an attempt to “clean” silvered components. All you will end up doing is taking the silver off, which will likely lead to other unintended consequences. I sometimes use Scotch-Brite or a similar product to clean finger stock along doors and hatches, but that’s it.
THE TUBE SOCKET
The aging tube socket is one of the most frequent sources of problems in any vacuum tube amplifier. The finger stock, arranged in concentric rings, make up connections to the tube itself, and often get broken and (due to gravity) end up in other parts of the socket. For this project, your tube is still out of its socket anyway; so, using as much light as you can, and an inspection mirror if necessary, inspect the socket for missing finger stock pieces and if too many of them are gone, find out if you can get a new socket.
Screen bypass capacitors that are either connected directly to the screen grid ring (like doorknob caps) or even made up of a thin layer of dielectric material sandwiched between layers of the socket can and do fail. In the case of the former, get replacements and change them out. In the case of the latter, you’ll be forced to get a new socket. Be forewarned that the “sandwich layer” bypass caps can fail under operating (i.e., screen voltage ON) conditions, but seem completely fine otherwise.
INPUT AND OUTPUT ACCESS POINTS
As you likely know, any amplifier can turn in to an oscillator if its output-to-input isolation is less than its gain. In other words, if I have an amplifier with 20 dB of gain, but only 19 dB of isolation between its output and its input, I will (at best) have an unstable circuit on my hands. Some transmitter manufacturers attached “finger stock” or RF gasketing around the inside “boundary” of the hatches so that the hatch itself doesn’t pass RF. The point is to keep the openings (even when they are closed) from diminishing the output-to-input isolation of the amplifier. As such, they’re very important to the stable operation of the amplifier.
Both RF gasketing and finger stock are fragile and have a tendency to break, or come off, the door hatches over time, so be careful with them. If they are missing, you’ll need to replace them.
The author is engineer/project manager for iHeartMedia Los Angeles and tech editor of Radio magazine. Contact him at [email protected]