This is the sixth in a series about the author’s experiences helping to launch and operate WDOG(LP) “The Rock Dog.”
Read Dan’s first feature in the series, “It’s the People Who Craft a Career in Radio,” his second, “In New Philadelphia, the ‘L’ in LPFM Stands for Local,” his third, “This LPFM Fills a Rock Music Format Void,” his fourth, “So You Have an LPFM Station. Now What Do You Do With It?“ and his fifth, “This Low-Power FM Gets a Whole Lot of Bark Out of Its Signal.”
I have shared some thoughts previously about “The Rock Dog,” a small LPFM in New Philadelphia, Ohio. It has always been very important to me to make sure listeners realize no technical difference between a 100-watt LPFM and a 100 kW Class C FM.
There is really no good reason why an LPFM cannot sound as good as a Class C. Obviously, an LPFM cannot cover the same distance or reach the same number of people, but when it comes to technical audio quality, signal size should not be an impediment.
When 105.9 WDOG(LP) started out two years ago, there were places where we could save money without compromising quality, and places where we couldn’t. There are workarounds for some equipment failures, so those items do not need to be at the top of your financial priority list.
On the other hand, some gear is very expensive to repair or replace, and certain items are absolutely critical to staying on the air or remaining legally compliant.
Take an LPFM’s antenna and coax, for example. Generally, these are not easily fixed, nor are they cheap if you need to hire a climber and a tower crew. Factoring in that the antenna is vital to your coverage and operation, this is an area where you should buy the best gear and hire the best help you can afford. Going cheap here means you will pay the price over and over again.
The transmitter is also critical, and it must be type-certified for LPFM use by the FCC. Under no circumstances should you use a discount transmitter not built for actual broadcasters. Verify the FCC certification if it is not from a mainstream manufacturer, and take a close look at the warranty.
If a manufacturer builds an awesome product, they can offer a long warranty without it costing them much. Since most LPFM stations cannot afford backup transmitters, check what the manufacturer offers for loaner or rental units up front.
Your Emergency Alert System gear is a strict legal requirement. You must have it, and you must make sure it is up to date and meets current FCC standards. Buying an outdated EAS unit off eBay is not going to cut it if it is not fully CAP-compliant, especially as compliance standards continue to evolve.
Mics, audio consoles and CD players can sit in a secondary tier because you can easily get by with older, cheaper gear when you start out.
Choosing equipment
When it comes to your main audio source — typically a PC running automation software — look at the company’s track record, the upfront cost and the recurring expenses for support and updates. Evaluate how intuitive the software is to operate, and keep your staff and volunteers in mind.
Will they be able to sit down and figure it out easily?
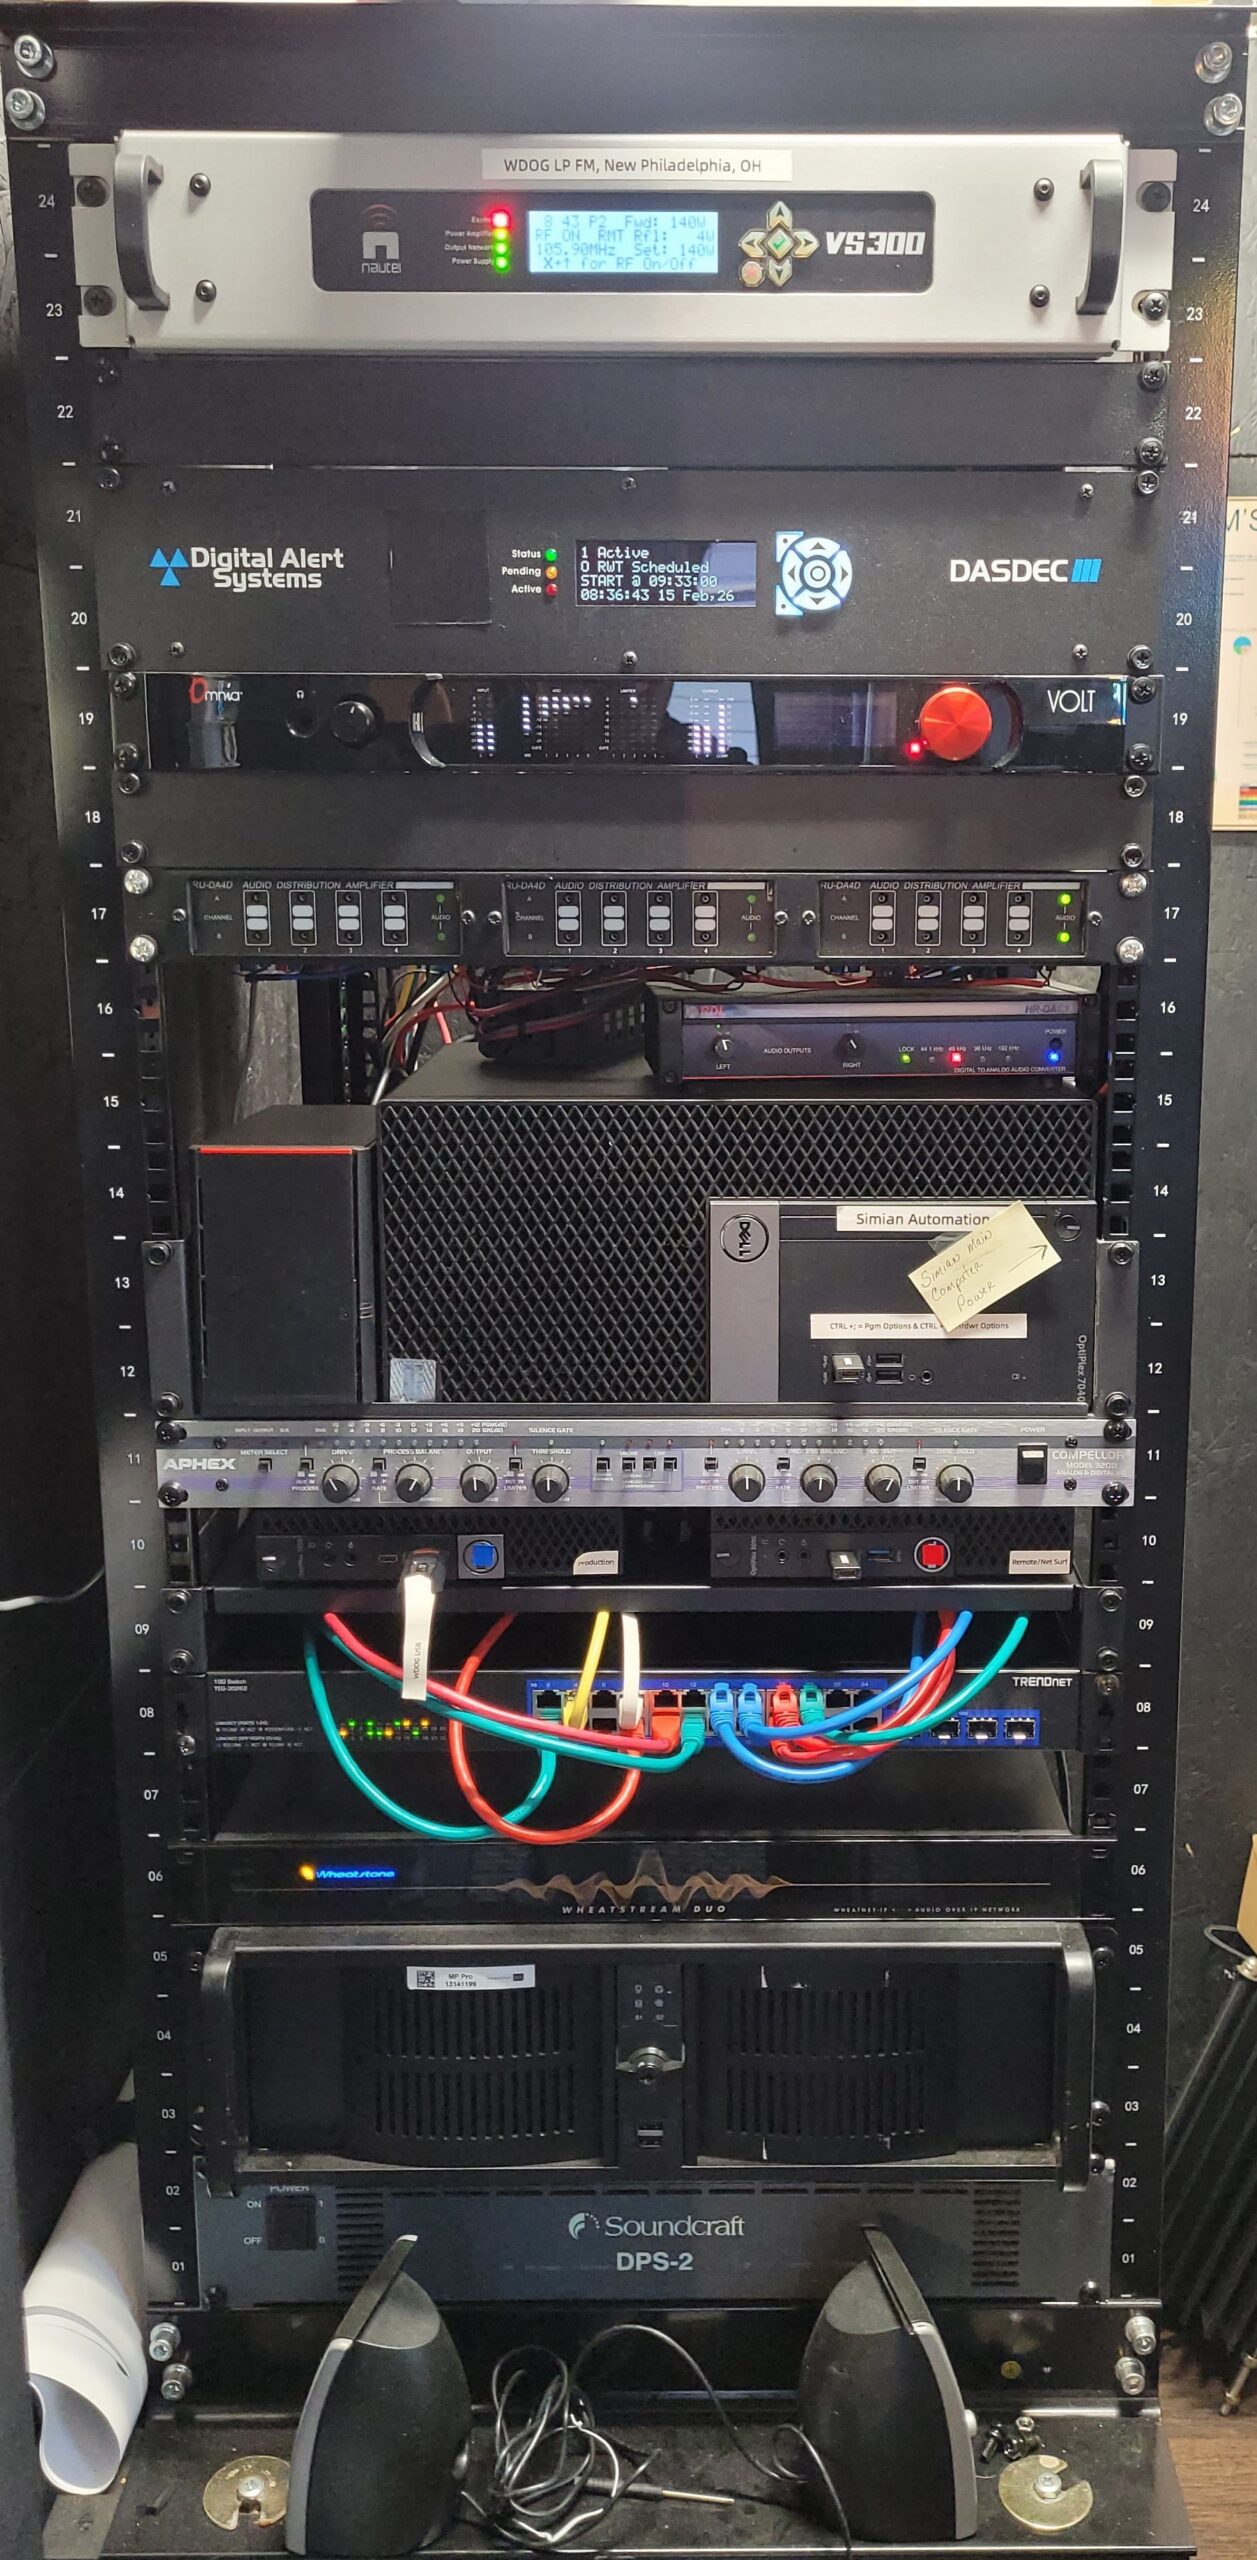
Specific to WDOG, our gear lineup started with a NiCOM BKG 77 two-bay antenna fed by Andrew half-inch coax. For our transmitter, we selected the Nautel VS300LP for a few key reasons: excellent technical support, proven reliability and our future plans to take the station to HD Radio, which would make us roughly the seventh HD-equipped LPFM in the nation.
For automation, I have used many different platforms over the years. The system I found most intuitive, reasonably priced and backed by a great support team is Broadcast Software International’s Simian.
When it came to microphones, I wanted our announcers to have the warmth of an Electro-Voice RE20. About 10 years ago, however, I discovered the EV RE320 neodymium mic. It was less expensive because it was manufactured overseas, yet in my opinion, it offers that same signature warmth at a better price point.
For guests, I have seen far too many non-radio visitors get mic shy. They back away from a standard studio mic as if it were a toilet brush, or they freeze up with a heavy piece of hardware right in front of their face.
To solve this, I switched to Audio-Technica sports announcer headsets where the mic and headphones are integrated into a single unit. With the headset on, the microphone sits just below their mouth, completely out of sight and out of mind. They cannot back away from it, which gives you much better voice presence. I prefer the Audio-Technica BPHS1, and some distributors offer 3-for-2 deals that make them very cost-effective.
Studio considerations
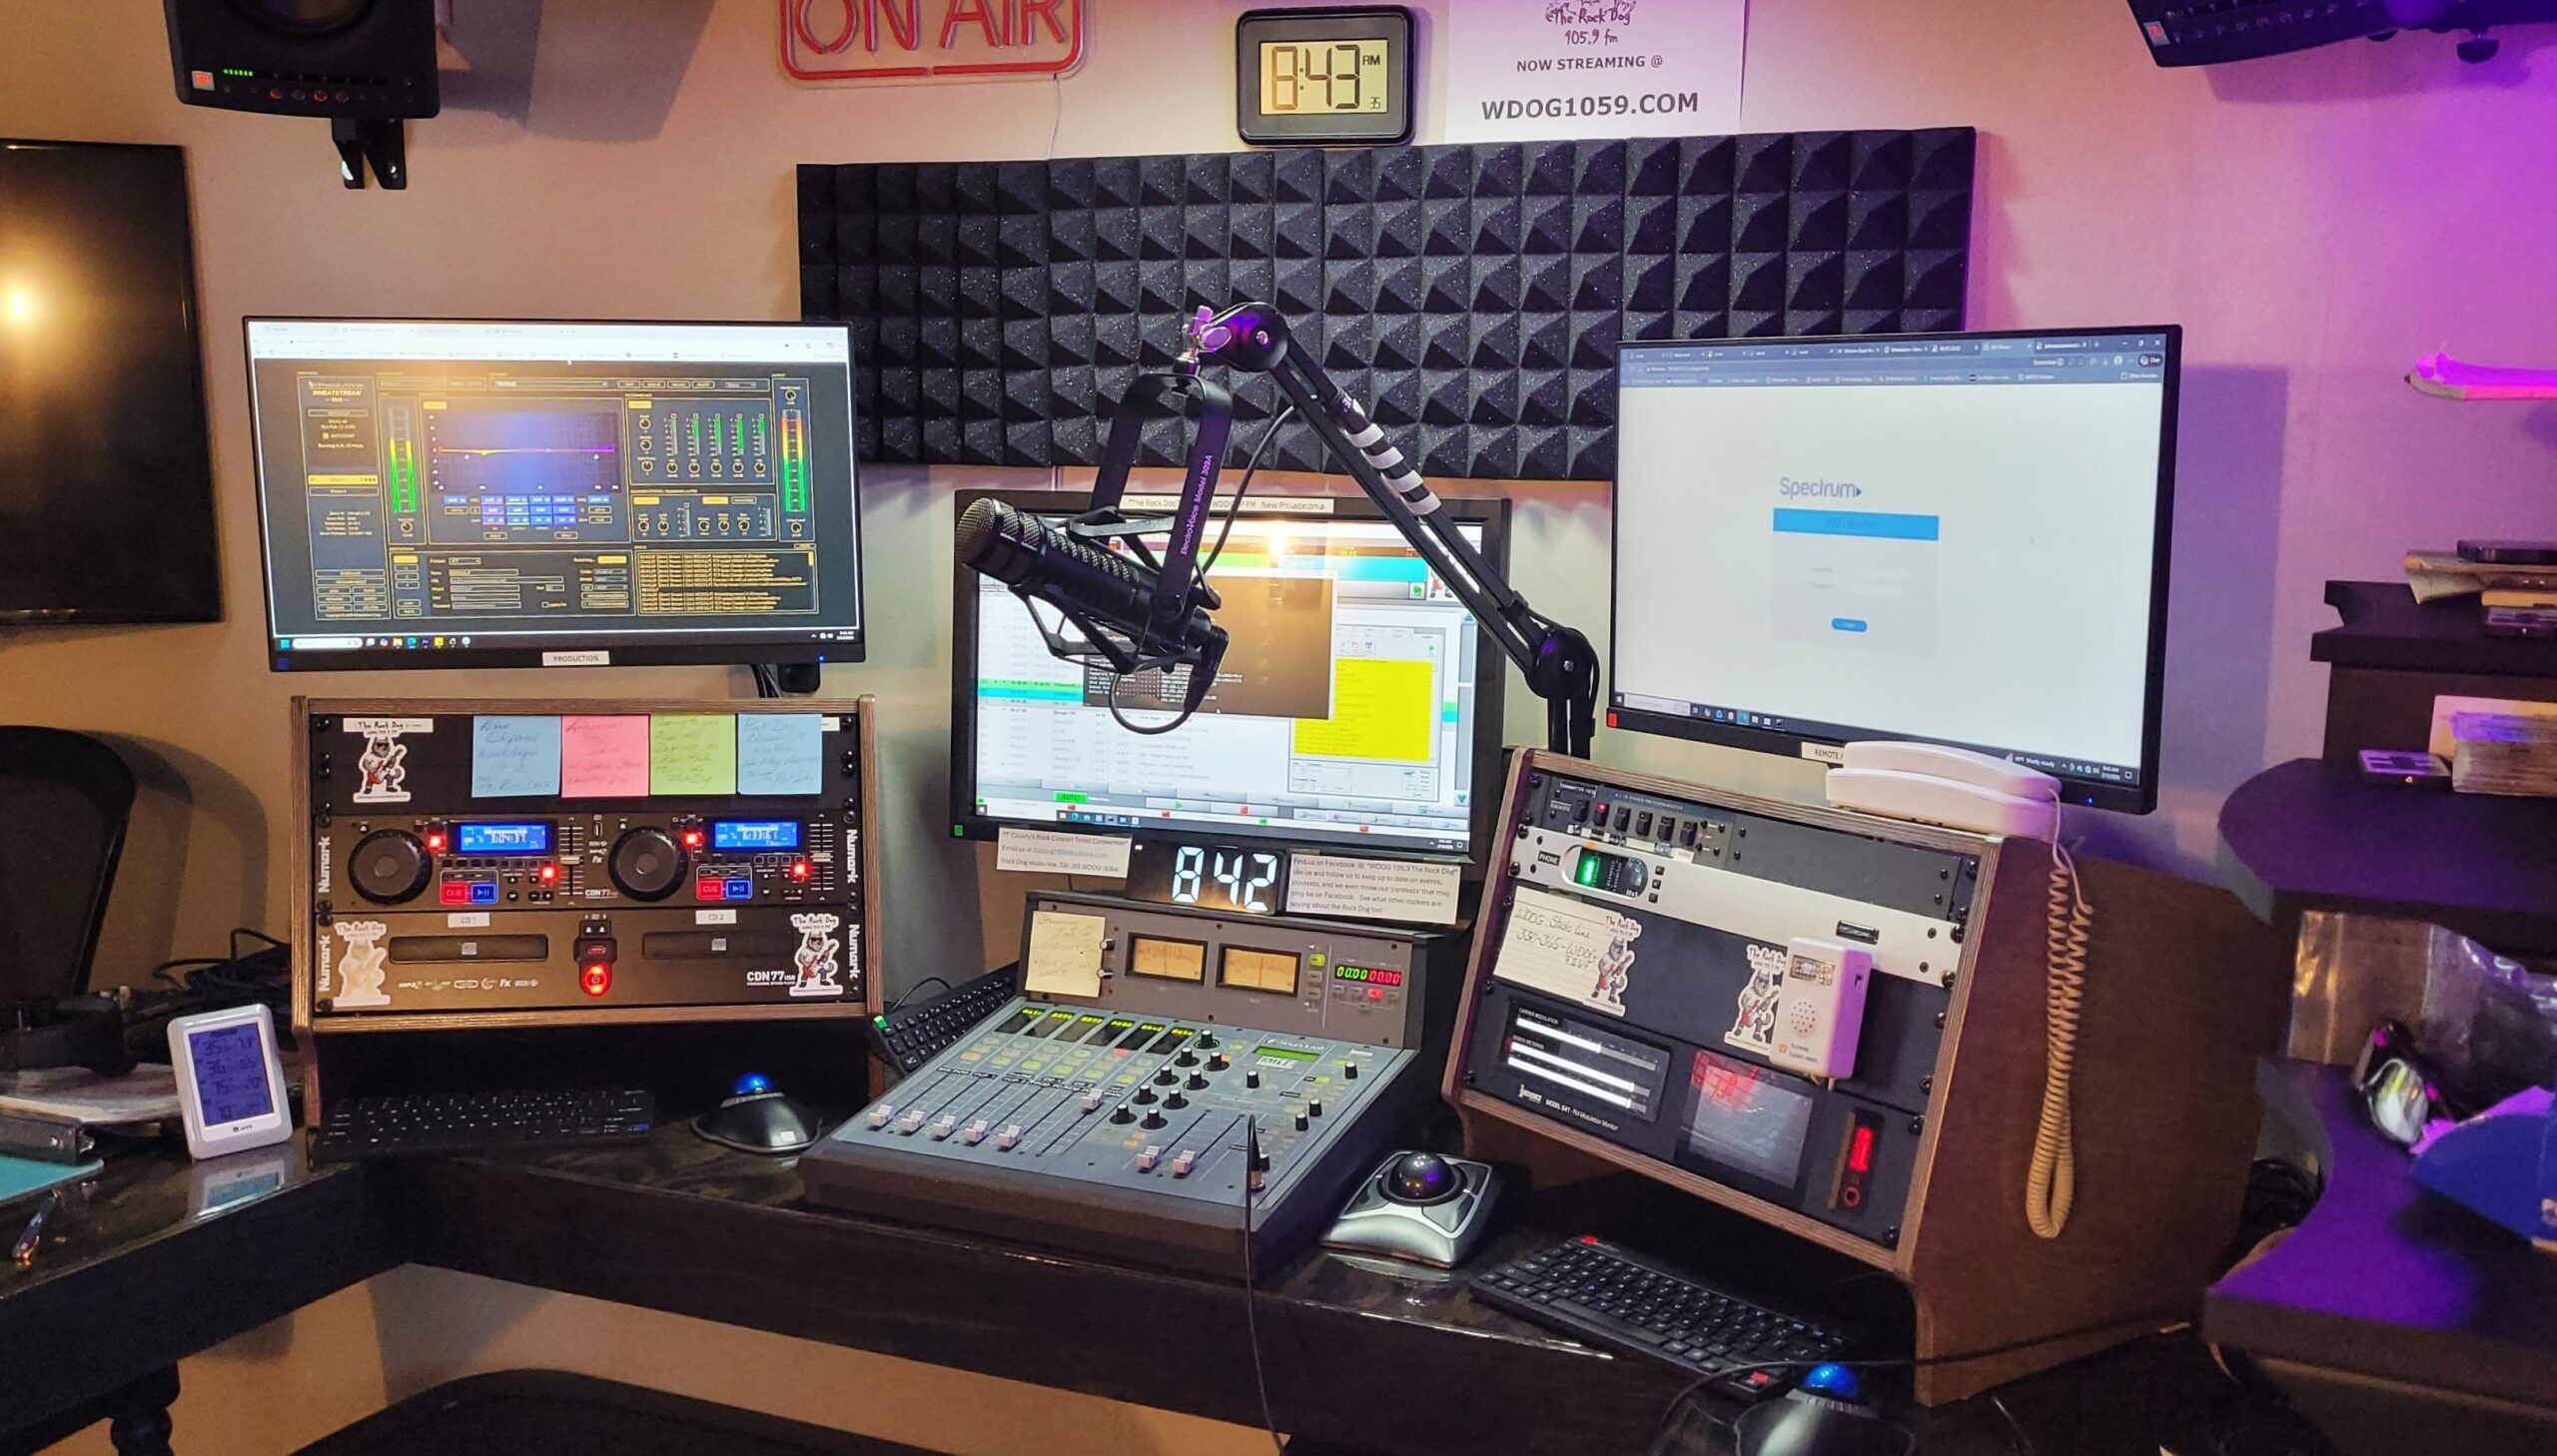
The audio board we started with is very special. It came from a BBC production room, purchased used, and is quite unusual for a U.S. broadcast station: a Soundcraft RM1ds. It is a compact, six-pot console designed and sold in 2000. When new, it cost around $20,000 because it was cutting-edge at the time.
Featuring fully digital internal mixing and processing, it included a full line of A/D and D/A converters so you could route anything from balanced analog to AES or S/PDIF digital. Every single channel offered active EQ and built-in Lexicon processing.
The board delivered phenomenal sound quality, headroom and features, but it is now 26 years old. My concern, which is well-founded, is that the surface-mount capacitors and internal components are reaching end-of-life.
The ideal time to replace a failing component is right before it breaks, but guessing when that moment will come is nearly impossible. My assumption was that 26 years was the limit.
Because I am a firm believer that a 100-watt station should not sound like a 100-watt station, I needed an audio processor that sounded great without carrying a $15,000 price tag. For my money, that was the Omnia Volt.
For online streaming, I place a lot of importance on processing appropriately for the web, which means not feeding a web stream directly from an FM audio processor. FM broadcasting has physical limitations that web streaming does not, while web streaming uses compression algorithms that over-the-air radio does not.
The right combination of processing and stream encoding makes a massive difference. In our case, we installed the Wheatstone WheatstreamDUO, which proved to be both cost-effective and capable of incredible results.
The entire station facility was built from the ground up, measuring roughly 16.5 by 12.75 feet. Technically, the space consists of a main studio and an adjoining transmitter closet.
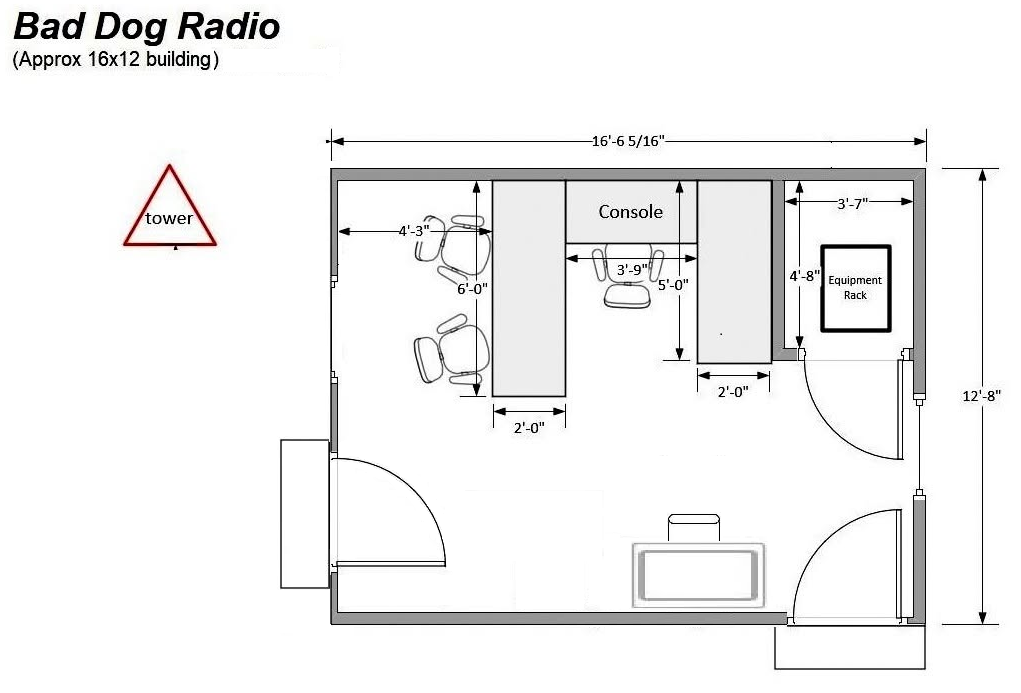
The transmitter closet houses our equipment rack for noisier gear. The closet is insulated, equipped with an airflow vent near the bottom of the door and fitted with a powered exhaust fan at the top to maintain continuous air circulation.
When we circle back in the next installment, I will detail how we designed the station as a single-studio layout to prevent on-air mistakes, and how we completed a full overhaul using AoIP technology in preparation for the next big milestone at The Rock Dog.