Baking Magnetic Recording Tape
Jan 7, 2002 12:00 PM
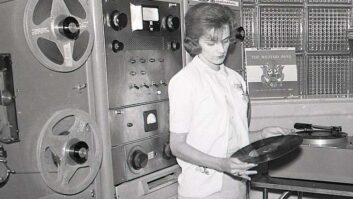
Over time, magnetic recording tape becomes unplayable because the binder used to adhere the magnetic material to the backing or a chemical added to the binder becomes unstable. Tapes in this condition will leave a gooey residue on the tape transport. This residue is comprised mostly of the magnetic material, and playing a tape in this condition will destroy the recording without accurately playing the recorded audio.
There are many individual recipes for baking tapes. For the most part, they are all similar in their process in that they are used to dry the tape at low heat. Once a tape has been baked, it should be dubbed within 24 hours. In most cases it is possible to re-bake a tape as necessary to retrieve the audio, but this should not be a substitute for copying the material, preferably to a digital format that will preserve the audio in its highest possible quality.
Stored tape should always have a smooth wrap. Tapes stored tails out after being played will naturally have this. Tapes that have been rewound at high speed typically do not have a smooth wrap. If the tape to be baked does not have a smooth wrap, try to rewrap the tape by transferring it from one reel to another without running it through the tape guides. This is not easy to do on most tape machines. You may have to do your best with what you have and rewrap the tape after baking it.
Several methods are listed here for your reference. Radio magazine makes no claim as to the suitability of any of these methods, nor is Radio magazine responsible for any loss resulting from the use of these methods.
Method 1
Place the tape in a convection oven for three to eight hours at 135 degrees F to 150 degrees F. Remove the flanges from the reels to prevent melting the tape.
After baking, remove tapes from the oven and allow them to cool to the control room environment for 24 hours prior to working with the tapes. This allows the tapes to cool, relieves pack stresses, gives the binders time to re-adhere to the base film, and allows residual lubricants deep in the layers of the tape to exude to the surface to make the tapes playable.
Method 2
Ampex recommends:
Time: 2 – 8 hours, depending on tape thickness.
Temperature: 130 degrees F, +/- 5 degrees, 10% humidity +/- 5%
After the heating cycle, let tape stand overnight to cool and stabilize. The tape should be good for a month or more.
3M recommends:
Time: 4 hours for 1/4″, 7 to 12 hours for greater than 1/4″
Temperature: 130 degrees F. +/- 5 degrees.
According to 3M, there is no need to worry about electric fields generated by an electric oven.
After completion of the heating cycle, allow the oven and tape to return to room temperature naturally.
Rewind the tape at normal playback tension both directions. Leave the tape tail out if it is not to be copied immediately. Otherwise, copy the tape to another medium immediately, or at least within two days. The copy playback should be done on a machine as perfectly aligned as possible.
NOTE: There is no chart that specifies a certain time/temperature for a given tape thickness or condition. Bake it for a few hours and give it a try. If there are still problems, repeat the process. You aren’t trying to restore a tape — just make it playable for a couple of passes so you can transfer the audio to a more stable medium.Be sure to use a good thermometer. Let the oven stabilize before you bake. Check the temperature every hour or so.
Method 3
Food dehydrators, such as the Snackmaster Pro model FD-50 from American Harvest, can be used. This particular model has four trays, which will easily hold a reel of 1/2″ tape. Thicker tapes can be baked by cutting a tray to make a sleeve.
Food dehydrators have an adjustable thermostat and a fan to circulate the air.