Circuit boards etched and drilled. This is a closeup of one side of the microphone PCB board. As you can see it is a little crowded.


The copper pipe before work began. Success! The mic head’s windows are cut out.

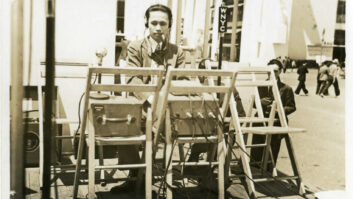
The mic body’s main metal body materials are pictured.

The mic PCB with the Lundahl transformer installed.

The mic PCB With the cheaper OEP transformer attached with tie. Audio engineers the world over appreciate the sound of vintage tube microphones like the Neumann U 47 or the AKG C12, but the cost can easily run to several thousand dollars, leaving them beyond the reach of all but the biggest studios (or well-heeled dilettantes). What if I were to tell you that, for under $600 — and with a bit of labor — you could enjoy a taste of that vintage sound?
Aarhus, Denmark, is home to Gyraf Audio, a small boutique audio manufacturer specializing in tube preamps and other processors. Their website, www.gyraf.dk, features a DIY section showcasing several projects, some based on products they produce. They don’t provide kits, but each project includes schematics, parts lists and PCB layouts. One such project is the G7 Tube Microphone. I recently took on this project, and here I share my experience and the extremely gratifying results.
DANISH MODERN
According to Gyraf’s Jakob Erland, the mic’s designer, the G7 inspired by the Neumann U 47 and U 67. It is a multipattern mic, capable of omni-, cardioid and figure 8 patterns. It uses a Peluso Labs CEK-12 capsule, modeled after the AKG CK12 large-diaphragm capsule, the same used in AKG’s C414 and the legendary C12. The tube is an EF86 pentode, and the audio output is transformer-balanced.
To start, I had to etch three small circuit boards; one for the power supply, one for the mic circuit and one for the tube socket, which mounts to the mic PCB. I used MG Chemicals’ (www.mgchemicals.com) positive presensitized process with a 4-by-6-inch board. I went through a few very tiny bits drilling the holes. Fortunately, the local hobby store sold them in packs of six.
Sourcing the parts, most came from Mouser Electronics (www.mouser.com), with a few from Newark Electronics (www.newark.com) and Allied Electronics (www.alliedelec.com). The capsule and its mounting saddle were purchased from Front End Audio (www.frontendaudio.com), and the Russian-made Electro-Harmonix EF86 tube and the socket were found at The Tube Depot (www.tubedepot.com). One important detail about populating the mic PCB — all components except for the tube and transformer are mounted on the trace side of the board. This was a bit confusing at first and made soldering a bit of a challenge as the board became more crowded.
The audio transformer is a Lundahl LL1538, available from K&K Audio (www.kandkaudio.com). The mic PCB can accept this transformer directly. While its quality is excellent, it comes with a high price tag (for me) — $90 shipped.
A lower-priced option that I also tried is the British-made OEP A262A3E, available from Newark for under $20. It’s a surprisingly good substitute, but it will not mount directly to the PCB. So I ran wires from its pins to the board and then used a nylon tie-wrap to hold it in place.
The body was fabricated from a piece of two-inch copper pipe. Hardware stores only seem to sell this in long sections, so I asked the maintenance department of my station’s parent company if they had any scrap and managed to score two feet of it.
The head of the mic is formed by cutting two “windows” to the sides of the pipe, about one centimeter from one end, with about one centimeter of metal left on each side. This is where my Dremel tool got a workout. Once I successfully cut the openings, I measured about 9-1/2 inches down from that end of the pipe and cut it off with a pipe cutter. I did it in this order so if I botched the “window” cutting, I could just trim off the mistake and start over.
Then I had to make the chassis that would fit inside the body and support the PCB, tube and capsule. This was created using a pair of 2-inch fender washers and a length of 1/4-inch square aluminum bar stock from Home Depot. It was all held together using small 90-degree brackets, screws and nuts. The bottom washer was drilled out to accept the XLR-7 jack for the mic output and power input. The edge of each washer had to be ground slightly to allow it to fit snuggly inside the pipe. On the top washer, a small metal bar with two rubber grommets provided a mount for the capsule saddle.
The grille of the microphone was made from a piece of brass mesh. In my case, my father happened to have a small roll of fine brass mesh given to him by a guy who used to work for Mack Truck. They used it to make fuel filters. A company called McMaster-Carr (www.mcmaster.com) sells brass mesh of varying sizes in small quantities.

Starting to Populate the Power Supply PCB

The Guts of the Power Supply Inside the Box

The finished power supply. A Hammond 1411Q 7-by-5-by-3-inch box would house the power supply. It needed to be drilled out for two XLR jacks, a couple switches and a power cord.
In order to keep the cost down, and make parts easier to source, the power supply was designed using two inexpensive toroidal transformers rather than a bulkier, multiwinding transformer that is often found in tube gear. A tube power supply has to provide a low-current/high-voltage rail for the tube plate, and a low-voltage/high-current rail for the filament. In this case, the low voltage is obtained from the 9V secondary on one transformer. For the high voltage, the second transformer is actually wired “backwards,” connecting its 15V secondary to the secondary of the first transformer, thus getting about 140VAC on its primary (which is now its secondary).
Finally, the cable from the mic to the power supply was made using a length of 10-conductor cable. Only seven wires are actually needed, so I just cut off the unused wires.
THAT SINKING FEELING
Once it all was assembled, it was time for the smoke test. I tested the power supply first, without the mic attached. The three polar patterns are created by sending different voltages to the capsule — 0VDC for omni, 80VDC for cardioid and 160VDC for figure 8. With all voltages looking healthy, and no shorts, it was time to test the mic itself. It’s recommended to test the mic with the chassis inserted into the body with the grille in place, since it provides electrical shielding as well as physical protection.
You can imagine the sinking feeling when I heard nothing. After checking voltages at several key points and checking components, I discovered the problem. A lead on one of the capacitors on the trace side of the mic PCB was poking through and touching the shield can of the OEP transformer. A slight “adjustment” and all was well.
It worked like a charm and was very quiet (the good kind of quiet, not the “I can’t hear anything!” kind). Using the Lundahl transformer made it sound even better.
The only other hurdle was building a suitable shockmount for it. Most are too small to accommodate such a wide, heavy microphone. I ended up making my own out of some 1/8-inch flat bar stock and nylon tie-wraps. As a finishing touch, I used inkjet printable water-slide decals to apply graphics to the power supply and a nice logo to the mic body, followed by a few coats of clear lacquer to hold the decals and protect the metal from tarnishing.
I’ve used this mic with excellent results on several projects. It’s become one of my go-to mics for lead vocal tracks. I loaned it to a friend who does VO work, and he wanted me to build him one (until I told him how much my labor would cost!).
As far as labor goes, it was a labor of love. It was very satisfying watching it come together over several months, solving problems of fabrication, hunting down parts and even chasing my tail a little in troubleshooting. I gained an intimate knowledge of how it works and what it can be made to do, as well as some new skills and some improvement in old skills.
Should you feel brave enough to undertake this project yourself, the plans, schematics, design notes and layouts are available at www.gyraf.dk/gy_pd/g7/gic.htm. I’ve posted my own parts list at www.radioworld.com/links under the Oct. 9 issue. For construction and troubleshooting help, www.groupdiy.com is an indispensable resource. Jakob Erland is a regular there. He and others provided tons of useful hints.
Curt Yengst, CSRE, wrote about the Plugin Alliance in the Sept. 11 issue. He is assistant engineer at WAWZ(FM), Star 99.1, in Zarephath, N.J.


The completed G7 microphone with the tube/transformer side of the mic board PCB. The completed G7 microphone with the back of the mic board PCB facing the viewer.

The Finished Products All Assembled