There is one skill that everyone should know: How to solder!
First we should offer this advice: Every job is so much easier when using the proper tools.
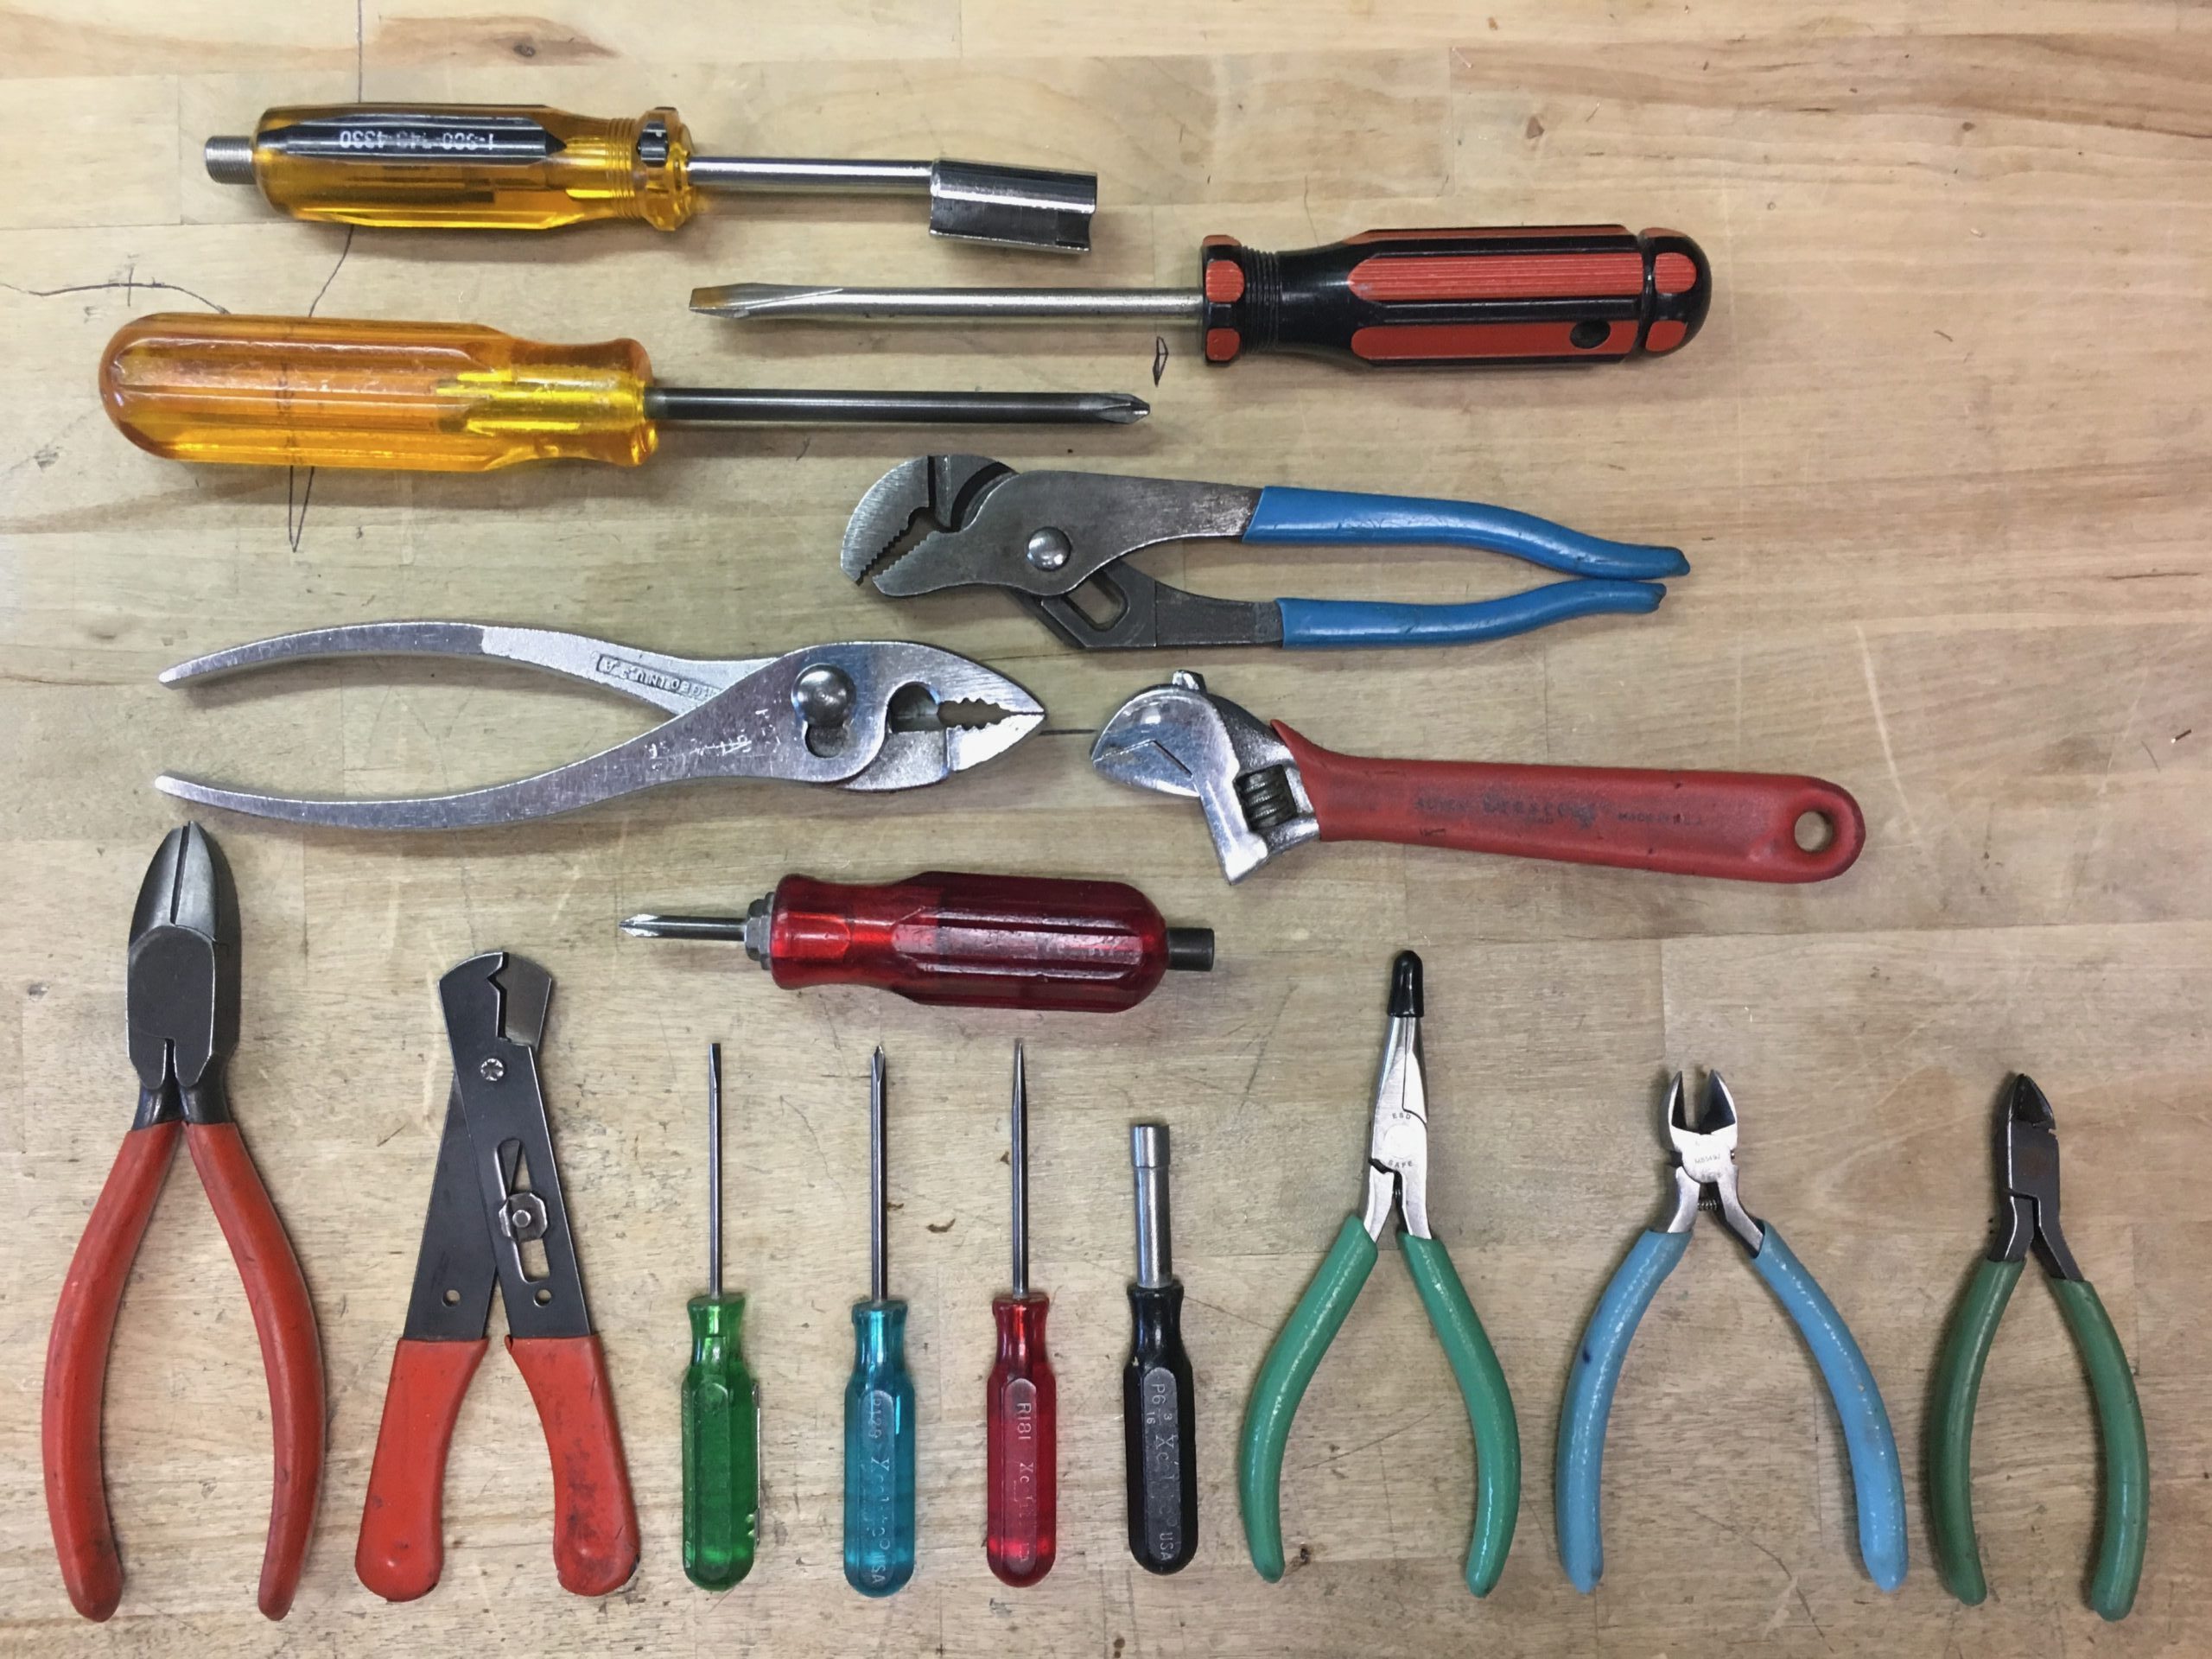
Over the years I have created a short list of basic hand tools that I carry that fulfill nearly every need in electronic work and repair:
- Cable TV F-connector removal tool
- Medium-sized Philips screwdriver
- Medium-sized straight screwdriver
- small tongue-and-groove plier for removing stripped-out screws (Channellock 426)
- Slip-joint “gas” plier (Diamond P27)
- Adjustable wrench (Crescent AC16C)
- Small combination screwdriver and nut driver (Xcelite 600)
- Medium-sized wire cutter
- Adjustable wire stripper
- Three Xcelite miniature adjustment screwdrivers: R3322 “greenie.” P12S “bluey,” R181 “reddie”
- Miniature nut wrench for tightening computer posts (Xcelite P6 3/16)
- Needle-nose plier
- Two fine wire cutters
- Pencil, pen and computer memory stick
A set of tools like this can literally last a lifetime. They fit into a convenient pouch like a Klein Tools 5139. You can conquer the world with this kit!
Everybody has individual tools that they like to have and use, and certain tasks will dictate your list. Can anyone survive without a Dremel tool and a set of metric and standard ratchet nut wrenches?
The Big Melt
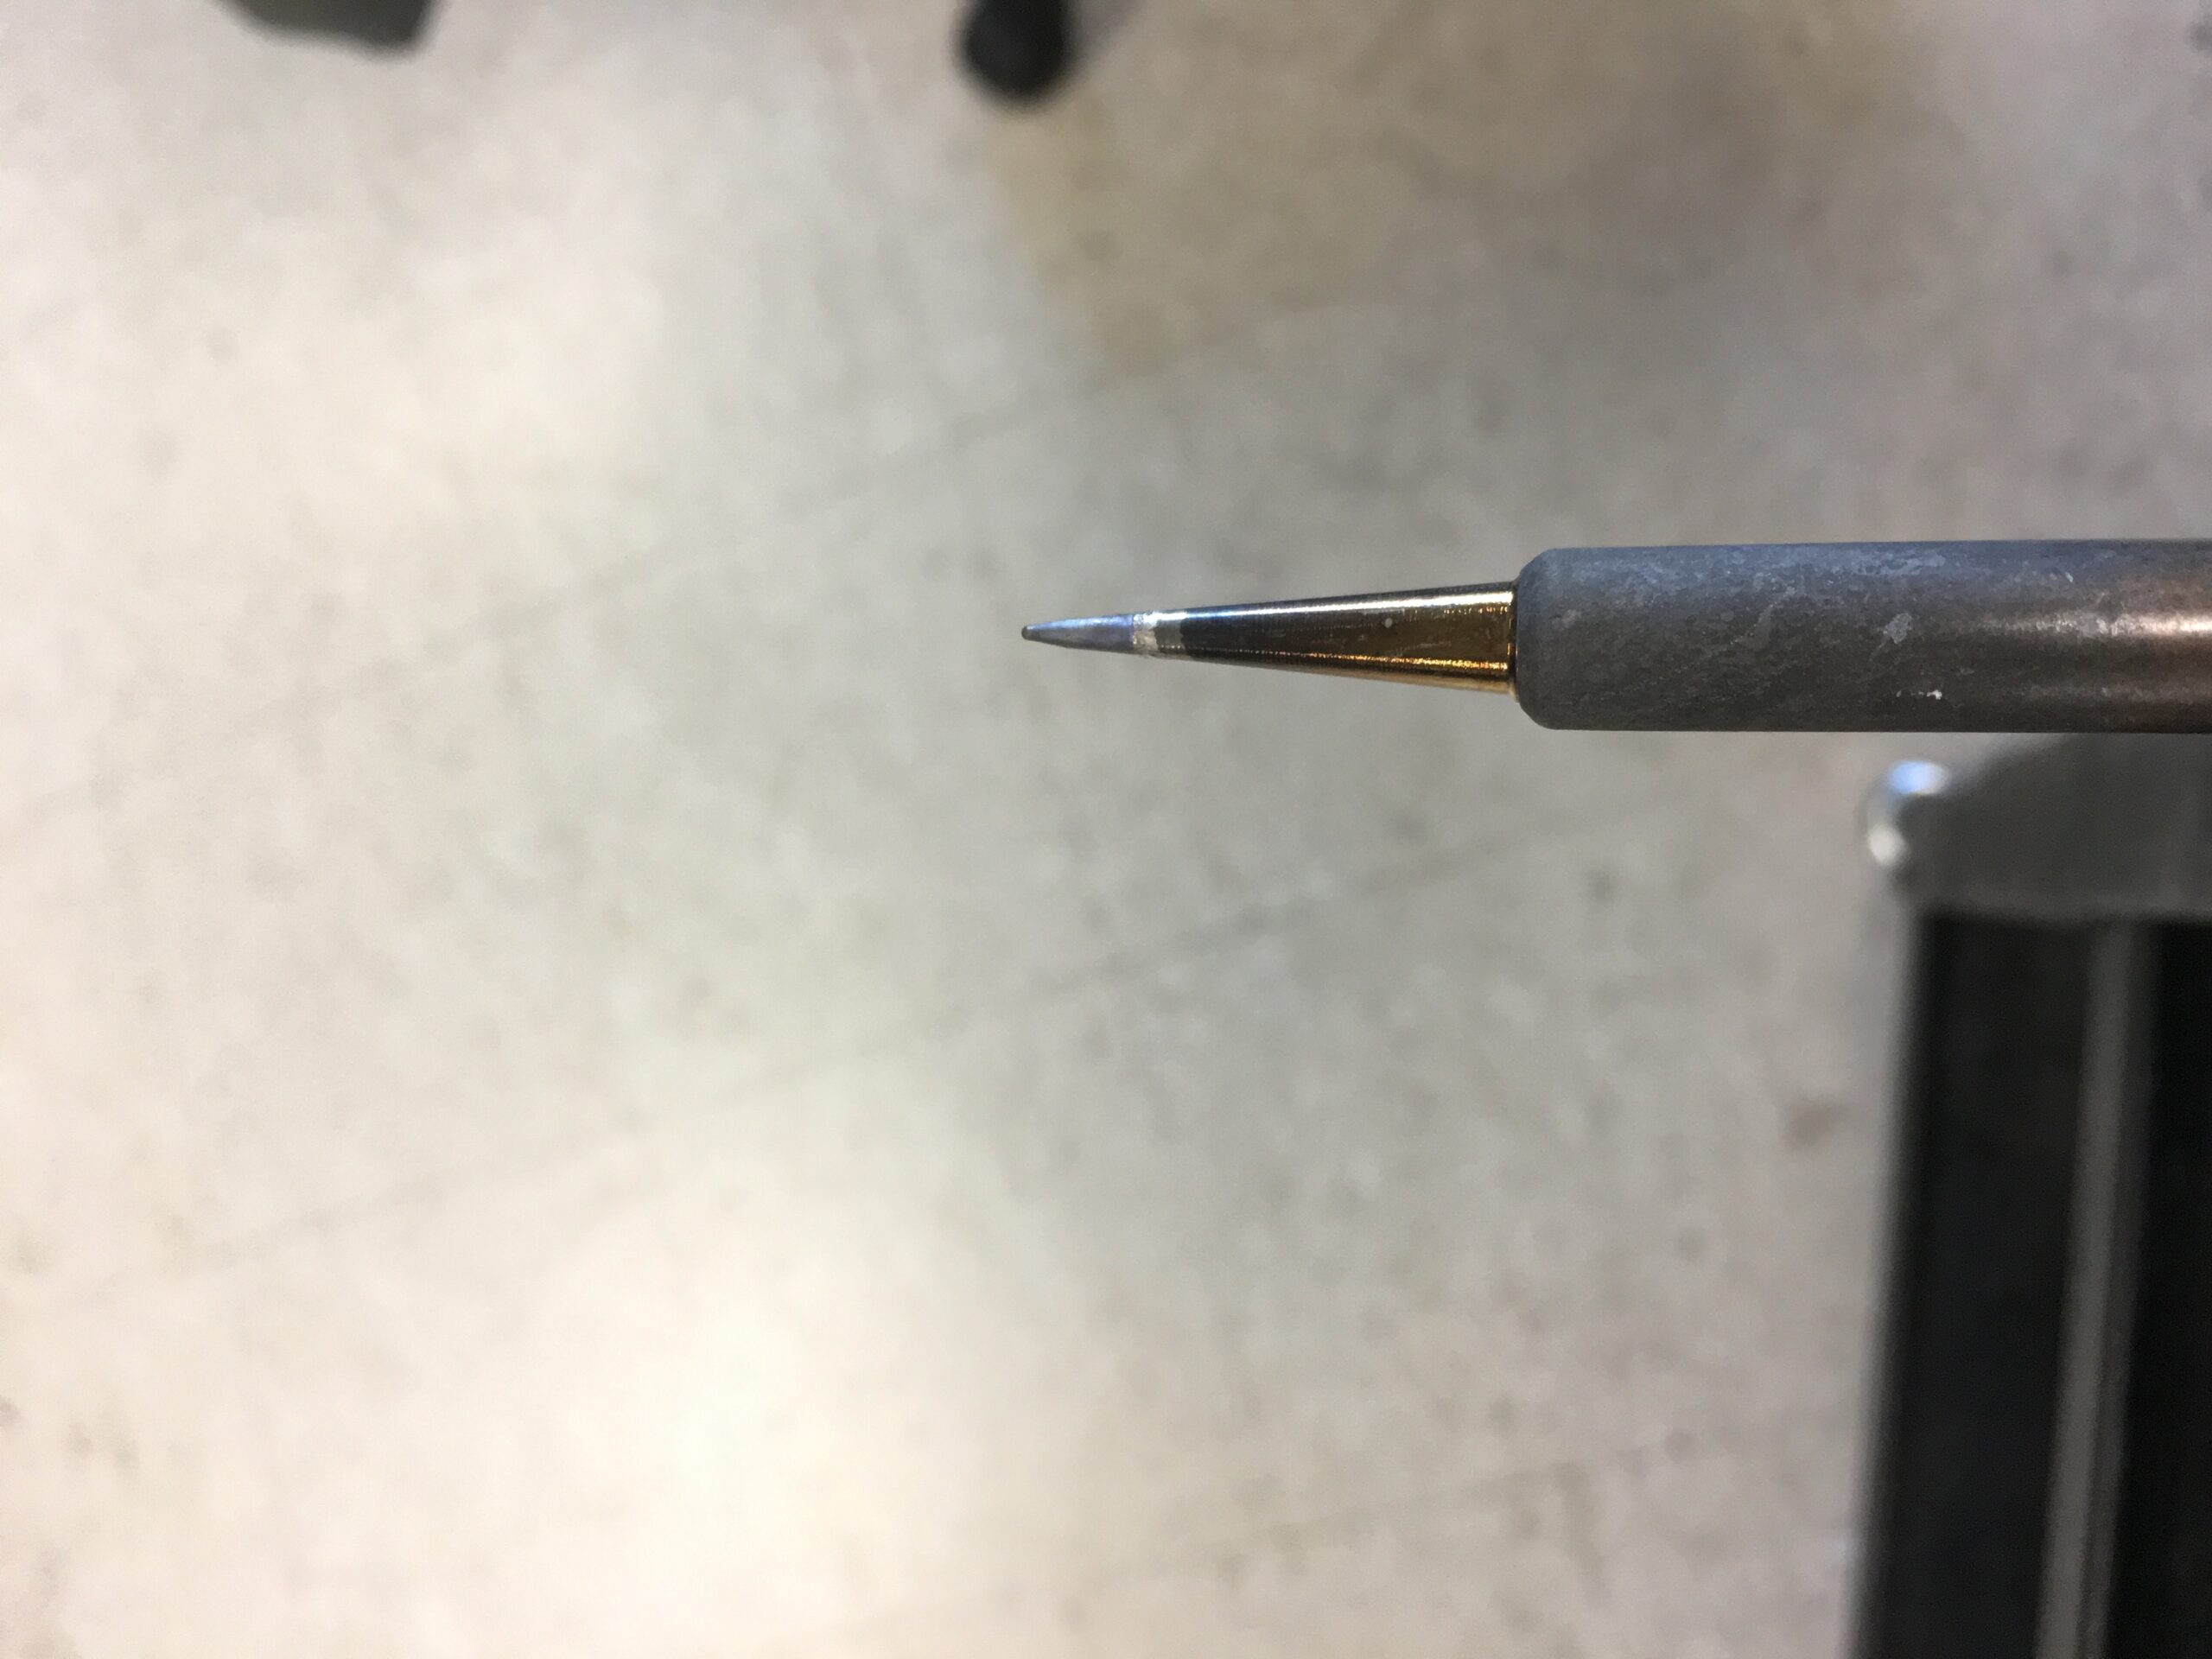
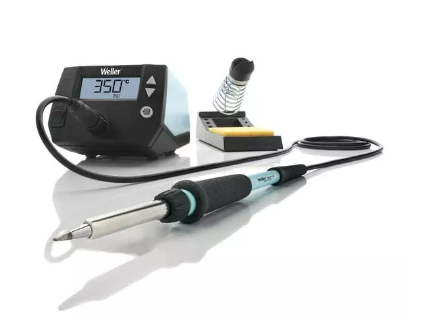
The main tool you need for soldering is a soldering iron. Today’s electronics usually require a 25- or 40-watt iron with a needle or small spade tip. Make sure your iron has an adjustable thermostat to hold it at the hot temperature; otherwise your joints will not be consistent. Runaway heat can eat up your soldering tips and end their life prematurely.
A proper soldering station is a lifetime investment. Buy once and use forever! For decades, Weller has been the standard for professional and hobby soldering. A Weller WE1010NA is a very good choice. On a budget, the basic Weller WLC100 will serve you well.
A few accessories are in order. I recommend three small plastic squirt bottles.
To aid in difficult soldering, keep a needle-nose bottle containing rosin flux; this will allow the solder to flow with ease when you need extra help.
A similar bottle should be at hand with water to keep your station sponge moist. Wipe the tip of your soldering iron along the sponge after each action for a clean start every time.
The third bottle should contain 99% alcohol. Moisten a cotton swab with it and scrub your work lightly to remove brown and sticky left-over flux from completed joints.
Finally, purchase a set of 2CYX5 hole cleaner tools to clean PC board component holes. These are long and thin miniature files that will prepare the holes before inserting a replacement part.
Here is the cardinal rule: When soldering components or wires to a PC board or chassis, cut the lead before you solder the joint! If you cut it after you solder, the snip action will shatter the joint. Dissimilar metals (the solder and the wire) will be exposed to oxidation. It will not be a sealed joint.
The correct method is to position the component, bend the leads that come through the board in the direction of the PC board “pads” and “lands” and snip both before soldering. This makes a good physical connection before you seal your work with solder.
Place the hot iron tip at the hole for a second or two to heat the joint. With your other hand, touch the solder to the tip and turn the tip very slightly as the solder melts over the joint. Use just enough solder to fill the PC board hole without making a bead of solder apparent.
Similarly, when you are working on a chassis, wrap the wire once around the terminal strip or post to make a solid physical connection and snip it to fit. Then seal the exposed wire to the post with just enough solder to make a good joint. Cut first, then solder!
If you are making connections with stranded wire, strip its insulation to bare enough wire to make the connection with a wire stripper. Twist the wire gently in your fingers until the wrap is tight, then seal the wire threads by melting a small amount of solder along the wire to “tin” them in place.
This approach makes the ends of your stranded wires just like a solid conductor. It also aids eventual soldering to the PC board or terminal connection.
The term “tin” comes from the composition of the solder itself. Most electronic solders are a combined alloy of 60% tin and 40% lead, or 63% tin and 37% lead. Examine a piece of solder cut with a wire cutter and you may see an amazing part of its formulation. Most solders have built-in “multicores” of rosin flux made from pine sap. Brown or golden in color, the rosin aids the solder to melt and adhere to metal joints known as “wetting.” Having the flux built into the solder saves you from applying the flux separately and will save you a lot of time as you build your project.
How do you know you have made a good solder connection? A fine solder joint should look shiny and smooth without creating a bead from too much applied solder.
If you remove your solder tip too slowly, you may create an unsightly “icicle.” If you move your component or wire before the joint has cooled it will look porous, cracked or dull gray. These “cold” solder joints make a miserable connection and will just cause trouble. Remember: Shiny and smooth = good!
Tips for a professional look
When you build a circuit board or chassis, position all of your components in the same direction. Resistor color codes should run up to down with the tolerance band towards the bottom of the chassis, or consecutive left to right. Similarly, capacitor positive side bands should be at the top or at the left with all the numbers (100uf 25VDC or whatever) all facing the same way and easily readable.
When positioning components vertically, make a squared-off bend at the top. This makes for a professional look and provides a nice place to grasp the lead with a meter or test probe if necessary. Quick rounded-off ends are never the same twice and don’t look like they were made formally. In all cases, try to position components uniformly across your project in a neat and thoughtful manner.
Should there ever be a point where component leads come too close to each other and may possibly touch, a piece of plastic tubing can provide insulation that may save you from catastrophe. If you don’t have factory-made tubing available, a leftover piece of wire insulation may suffice. A piece of tubing can also cover points where wires have been spliced or otherwise repaired.
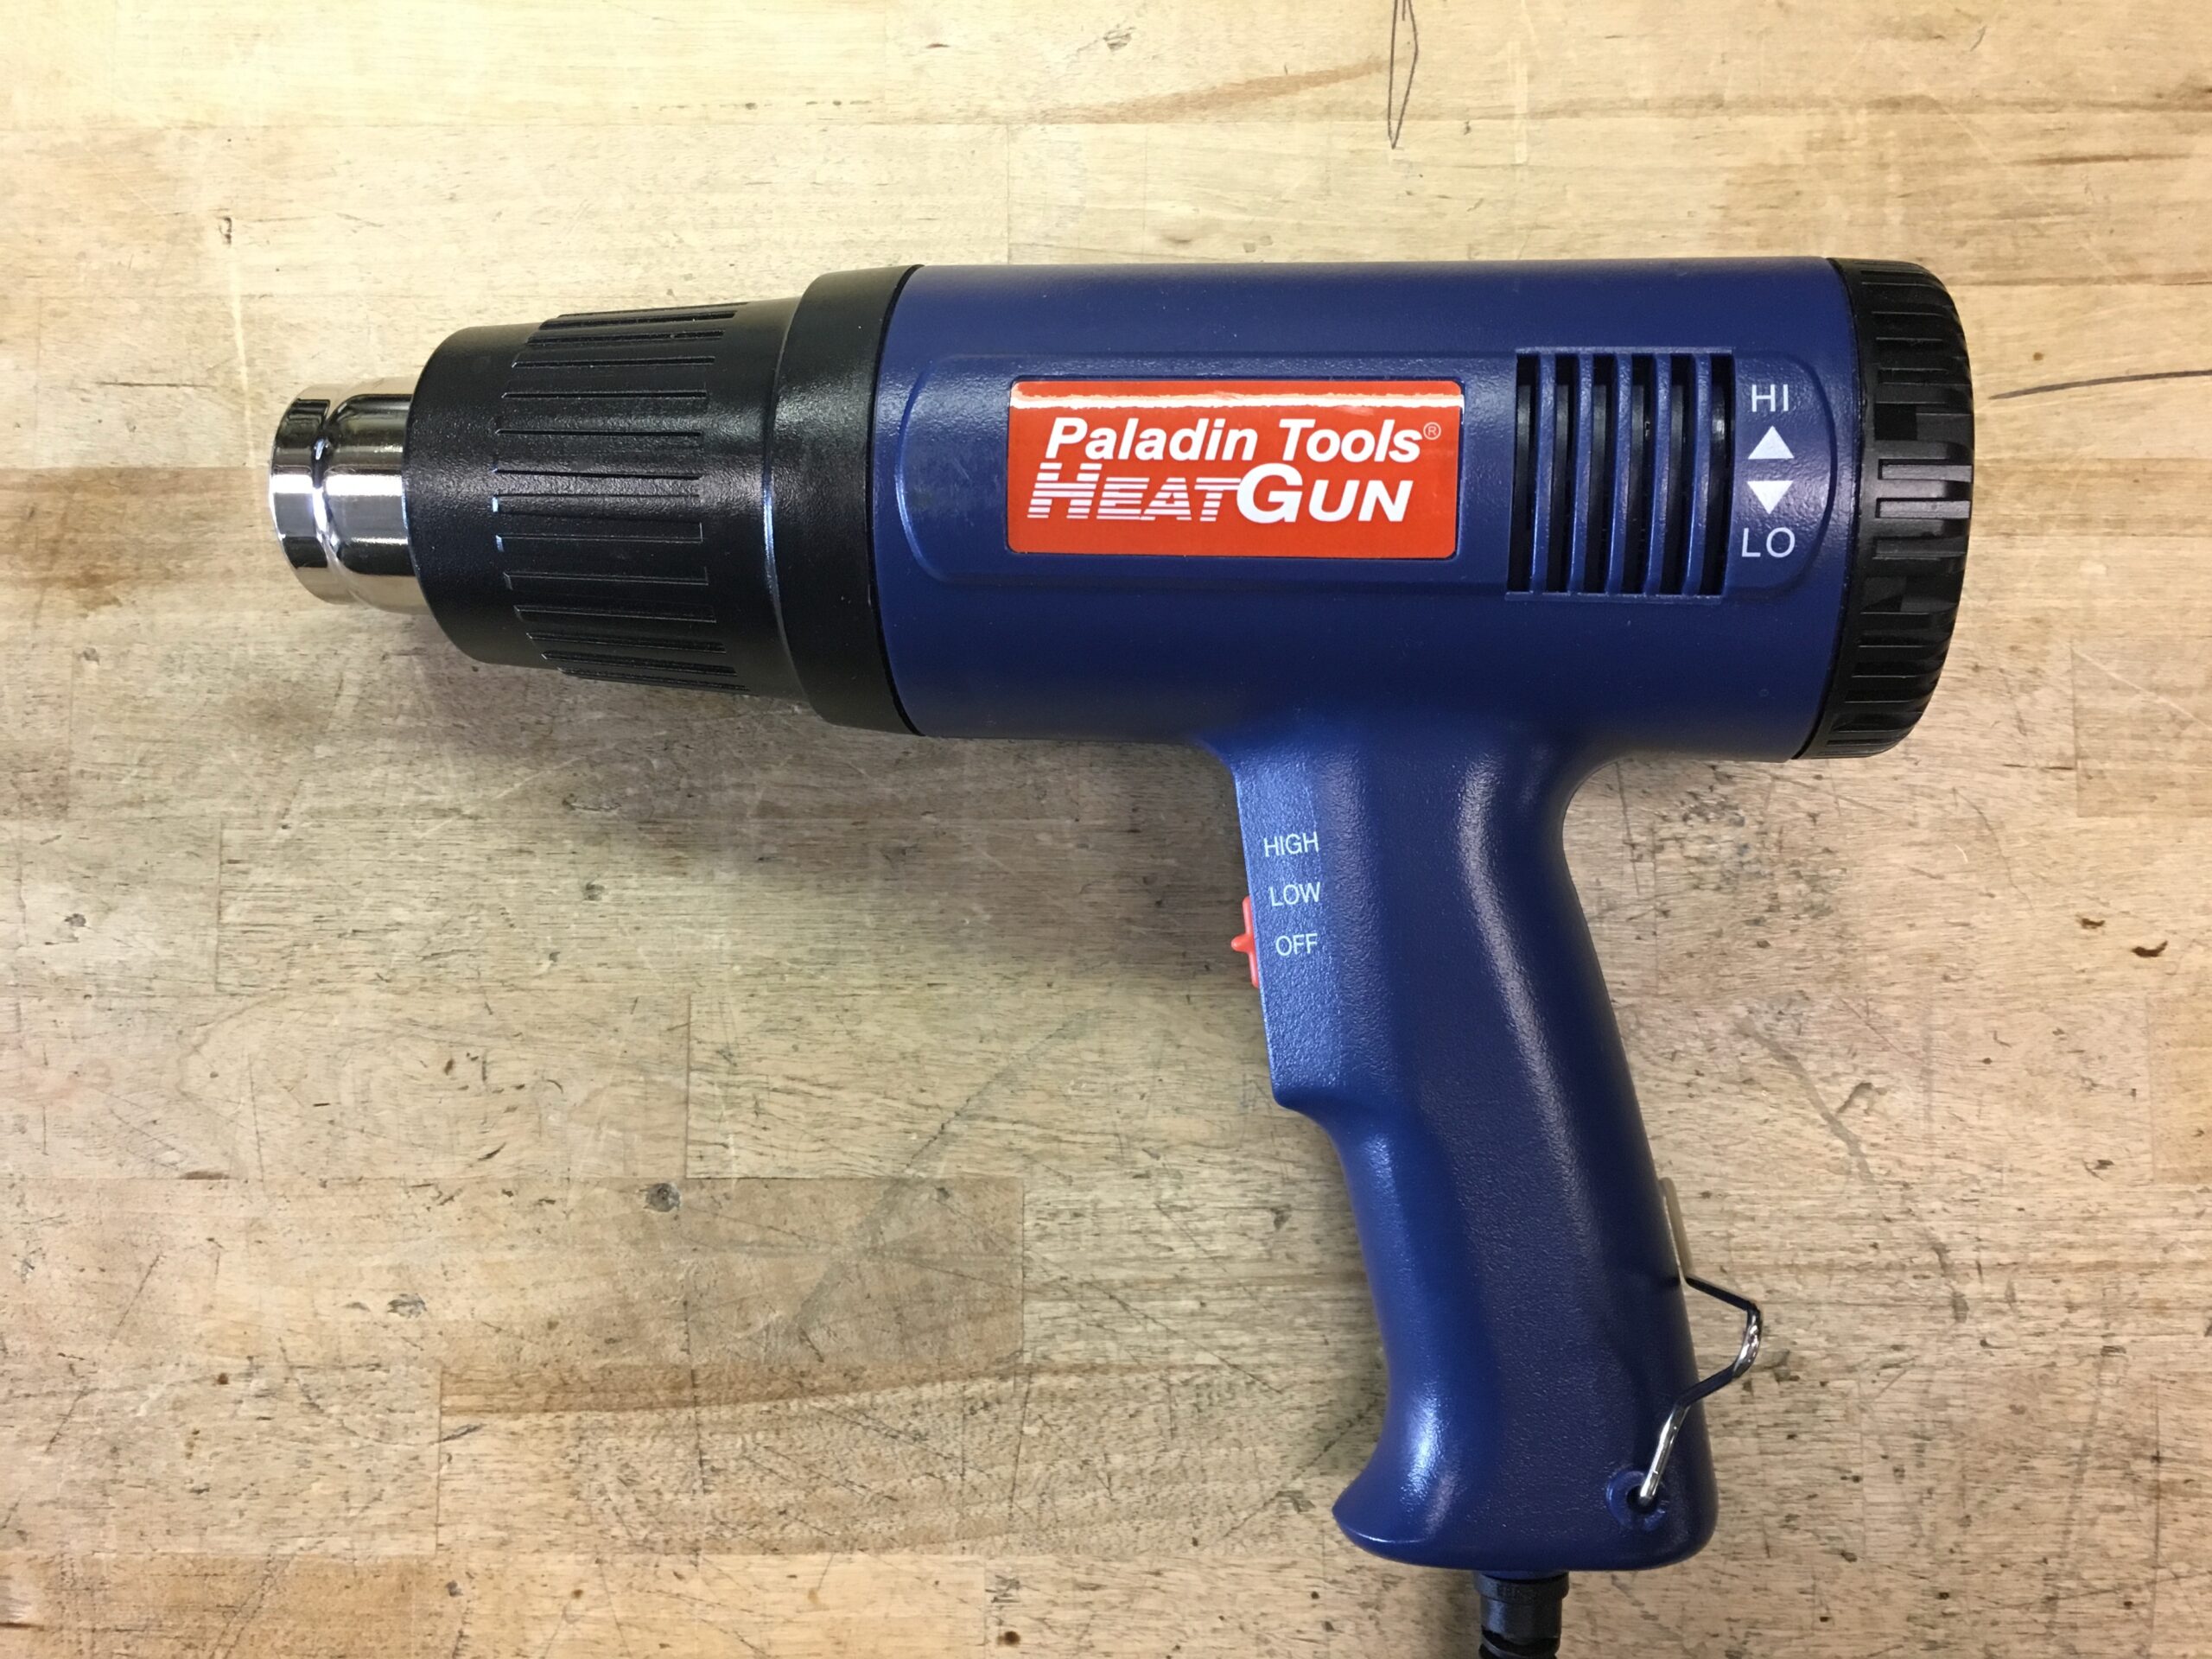
Also available is “heat shrink” tubing, the deluxe material for insulating wires and splices. Heat shrink has a rubbery plastic feel and will conform to the shape of whatever is inside it. Cut an appropriate length to cover your wires or repair, then apply heat using a heat gun — like a hair dryer but higher in air temperature — and watch the tubing shrink a wrap itself tightly around your work.
Construction hints
Repairing circuit boards requires more advanced skills. If you need to remove and replace a component — maybe a burnt resistor or a shorted capacitor — you’ll need to remove the solder from the solder joint as part of your “rework.”
Credit:
N2KZ photo
There are three ways to skin this cat.
Some people prefer to use a weaved braid of fine wire called solderwick. When a solder joint is reheated, you can place a piece of solderwick on the joint and hope the molten solder will migrate to the wick, pulling it away from the joint. This is troublesome because the wick adds a lot of surface area and the solder will require a great deal of heat to become molten. The PC board and the etched wiring lands and pads can also become overheated and come off the board. This isn’t fun and it’s difficult to do.
You can also use a “solder sucker” such as the Edsyn Soldapullt. This is a long cylindrical pumped suction device. You press a plunger down into the cylinder. Heat the joint with your soldering iron until it becomes molten.
Place the Soldapullt’s point over the solder joint, then quickly press the round button in the middle of the tool and you will create a powerful momentary suction that instantly removes the molten solder with grace and style. I prefer this method.
An expensive version of this concept is seen in professional rework stations. A hand-held metal nozzle heats to solder-melting temperature. Place the nozzle over your joint and press down on a foot pedal switch. The nozzle will apply suction and discreetly clean the joint. You have to keep the nozzle clean to continue having good suction.
[Sign Up for Radio World’s SmartBrief Newsletter]
Conspire to wire
While I am at it, let me please include some wiring tips.
I have seen all sorts of ways, simple and complex, of holding wiring in place as you attempt to solder wires to a connector or whatever. People use desk vises, vises with alligator clip attachments, expensive pivoting frames and lots of other things.
Having spent a long time on the road, I developed simple methods of getting repairs and wiring done with simplicity.
One trick I like is to make a needle-nose or other plier into a locking plier by wrapping a rubber band around the handles. It will hold anything with a gentle touch so you can solder it without effort.
I have developed a similar technique by resting heavier tools like my large wire cutter over a wire or cable to hold it in place. It works like a charm! When you get the hang of this, wiring can become quite rapid and easy. I use this for soldering all sorts of things especially audio XLR connectors or multi-pin “mult” cables for connecting multiple audio circuits with one large cable.
Speaking of soldering cables that require multiple connections: Always slide the collar or shell of the connector onto the cable before you do all your painstaking soldering. Nothing is sadder than a beautifully built connector without its cover. The agony!
Prepare the multi-wire end by stripping and tinning the ends before soldering. Remember the wires that go to the outside pins need to be slightly shorter than the inside pins. Start by soldering the inside pins first and work your way out to the outside to finalize your job. It is much easier to do when your work is in the clear instead of trying to solder around wires you have already completed!
Learn to use just the right amount of solder to make a good connection. Don’t overload a “cup” with too much solder so it beads up and expands over the connection point.
Also, get to know the place to adjust your iron for the correct temperature. Too hot melts plastic and ruins connectors. Too cold makes for crystalized cold solder joints, lousy connections and peril!
Be very careful with PC boards that have connections inside the board layers. Multi-layer boards are best repaired at the factory and not at your bench. Professional PC boards are often made by a process called wave soldering, where all the components are placed perfectly by automation before soldering. The boards then go precisely through a carefully heated and prepared bath of solder for pristine results. Similarly, surface-mount technology boards are fragile and require great care. Sophisticated expensive workstations and advanced skills are needed to enter the land of SMTs! High-tech boards are hard to repair in the field. Beware!
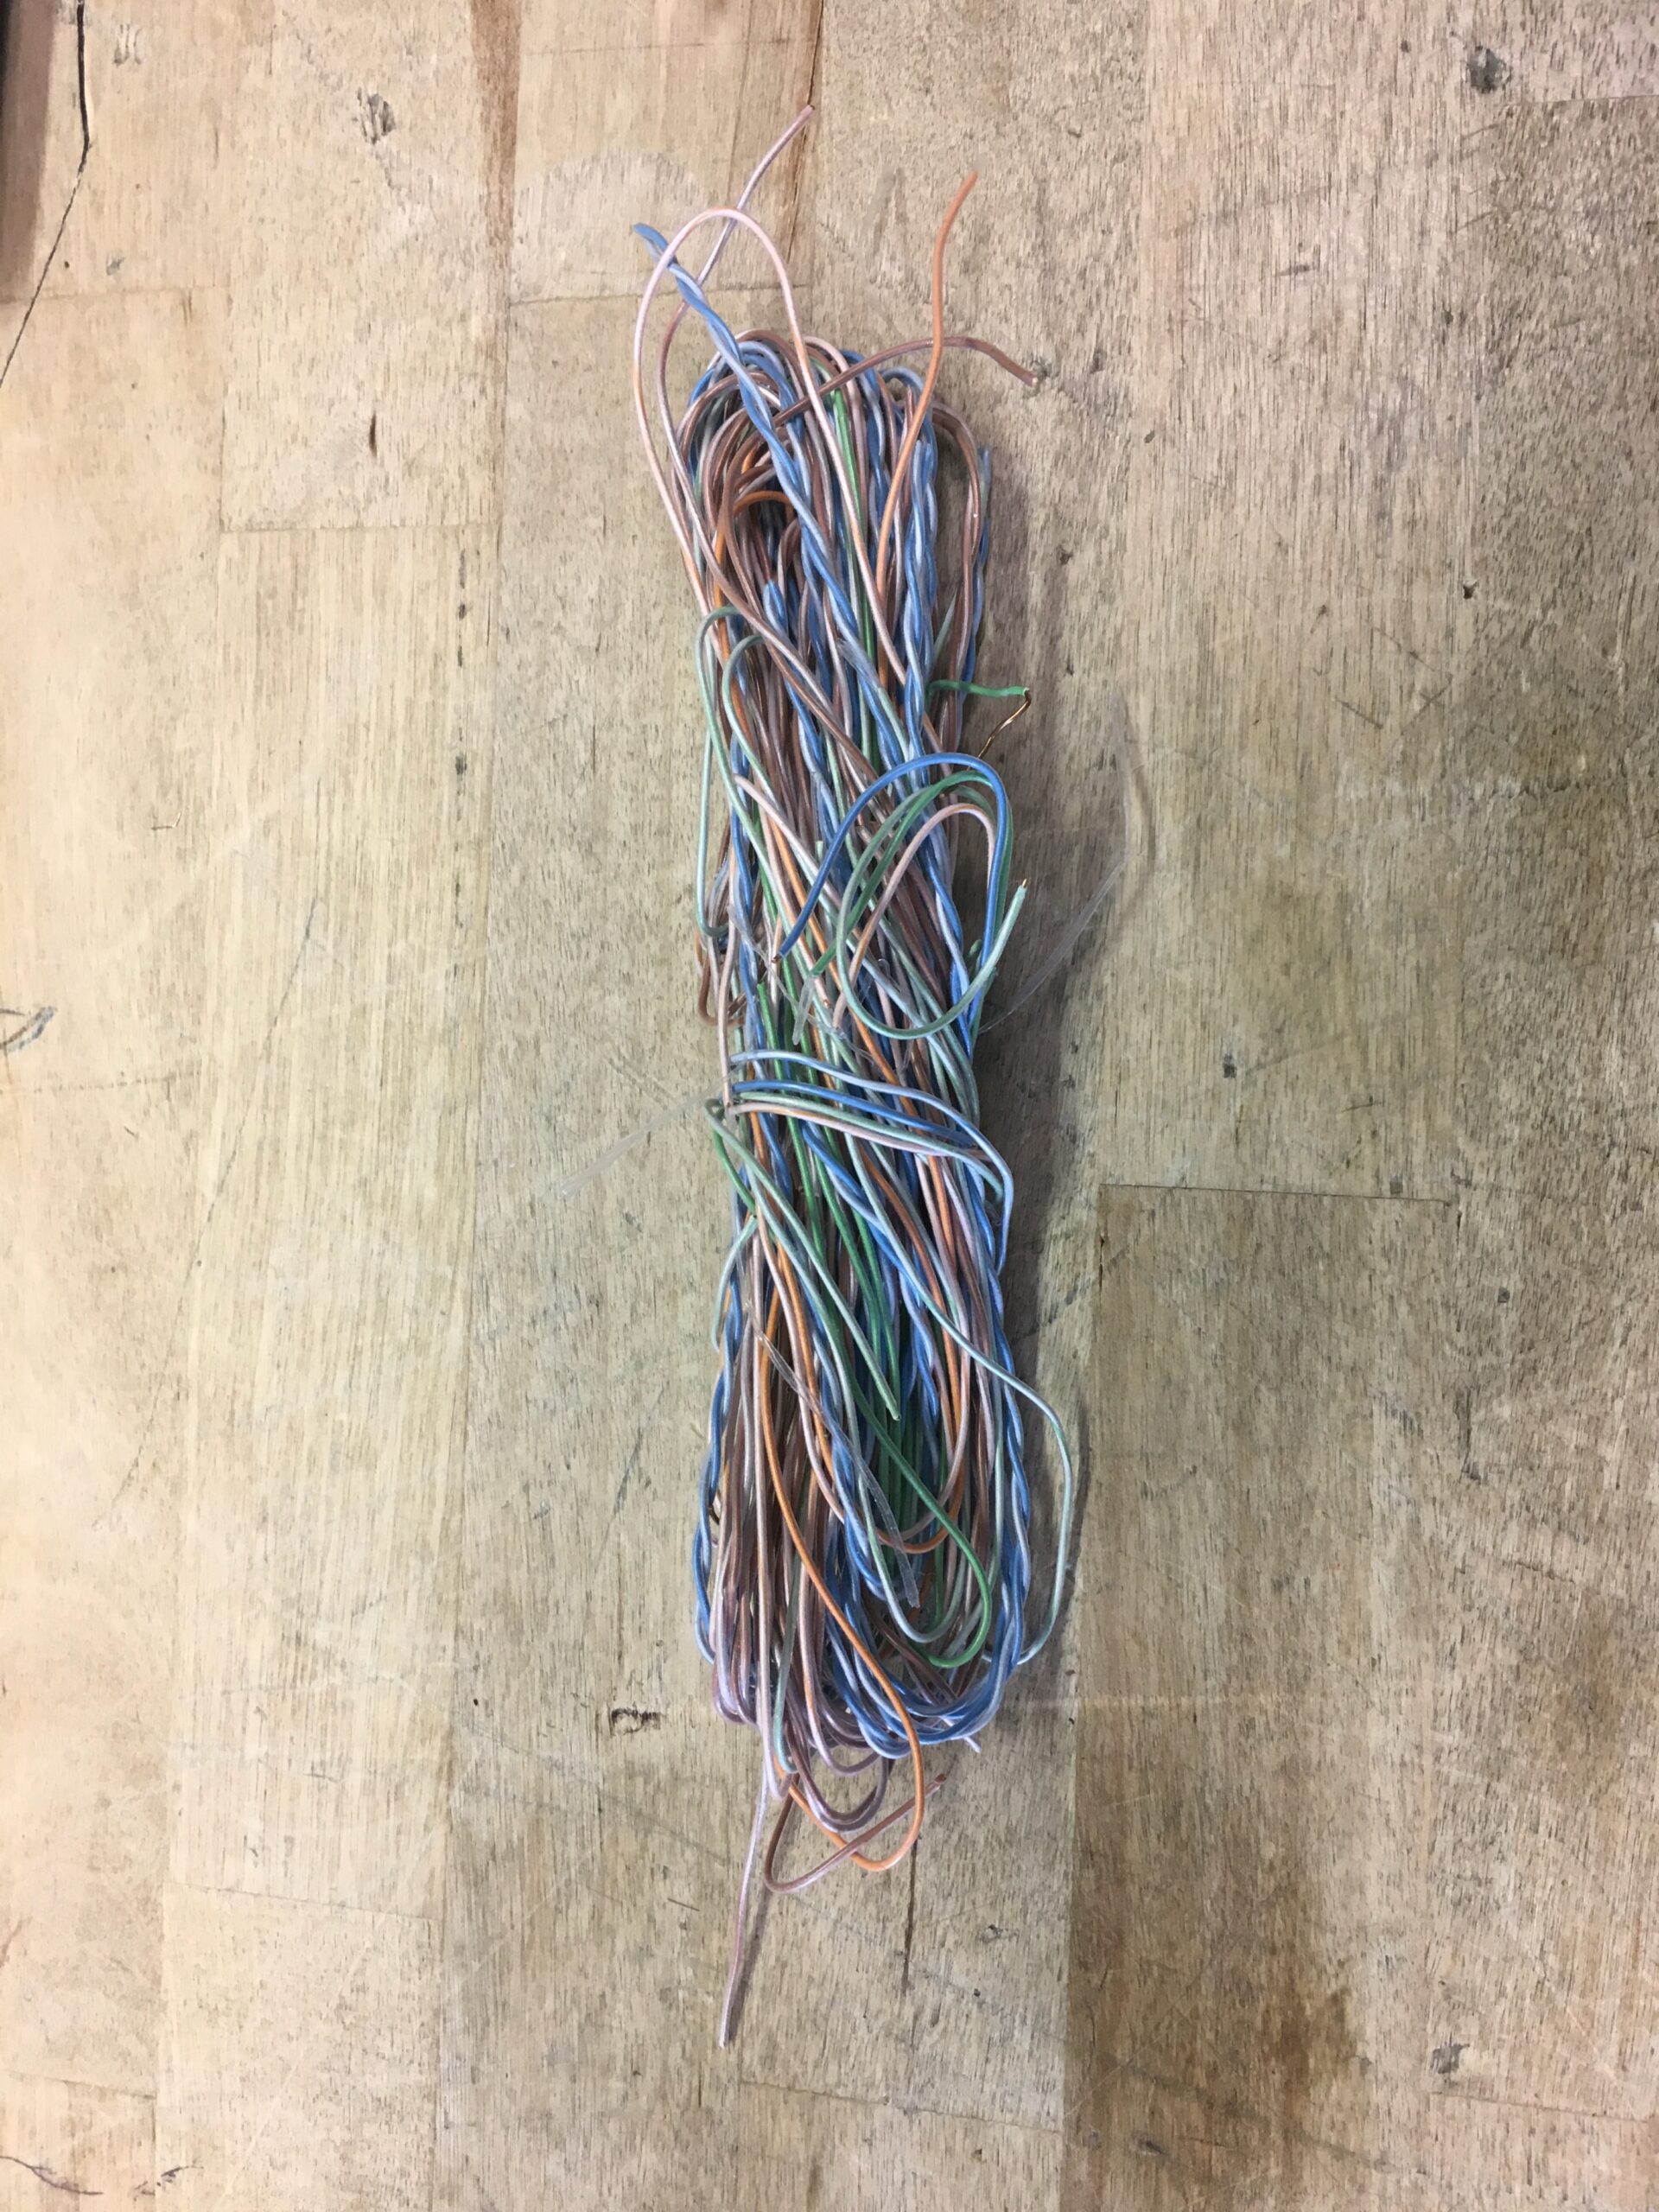
Also useful: Consider using the single-conductor wire found in either Cat-5 and Cat-6 cable and/or wiring used for old-fashioned telephone “telco” connections. These are fine-gauge single-conductor solid wires with a variety of color codes. Grab this kind of wire whenever you can. It makes excellent wiring for your projects or PC board land and pad repairs. Very useful and usually free. Scraps can be gifts!
Finally, keep in mind that my experiences are my own and not to be thought of as universal. We all have developed habits and procedures for soldering and construction that are comfortable for us. I would love to hear your hints.
Comment to [email protected]. This article was published in PCARA Update, the journal of the Peekskill Cortlandt Amateur Radio Association and is reused with permission.