We continue our series on the basics of troubleshooting. We’ve previously, we talked about analysis paralysis, and the downside of the shot-gunning technique. This month, we’ll go in to what I refer to as the “induction” technique.
The intermittent nature of most problems is what makes them difficult to resolve. You just can’t be there at the station or at the transmitter site 24 hours per day to see when a piece of gear acts up.

But in some cases, you can try to induce the symptom in the piece of gear, using an external stimulus. Let’s consider an example.
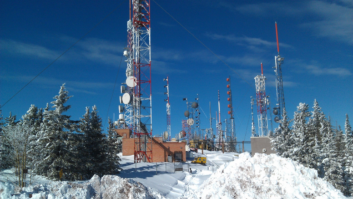
Let’s say you have a remotely located FM transmitter site that uses a radio studio transmitter link as its “main” and a wireline STL of some sort as a backup. One day, the station just goes silent, creating panic among programming types. Just as suddenly, the audio comes back, and sounds completely normal.
The next day it happens again. This time, you switch to your backup STL and the problem immediately goes away. You also take note that this happened about 2 p.m. in the afternoon (and it’s summertime, by the way).
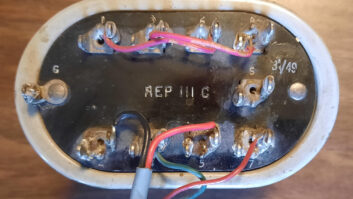
So, you visit the transmitter site and note that the receiver is working, and its metering is completely normal. There’s no sign of any problems at all. Still, you decide to either take the receiver back down the mountain (leaving only the wireline STL); or you install your spare receiver (which you do have, right?).
When you get back to the shop, you plug this receiver in and hang an antenna on it, noting that you pick up the local STL transmitter fine. It sits on your bench for days and continues working normally.

So how could it be troublesome at the transmitter site, yet work perfectly on the bench? Is there any way to try to induce the symptom? Yes, there is. (Note that the transmitter site is getting rather warm in the afternoon. Could this be a clue?)
Open the receiver, and very carefully, apply some source of heat to its inside. This could be a 100 W incandescent bulb or something like a small heat gun. Warm the insides up for an extended period (this is why the lightbulb is better). Does heat cause the problem?
If so, narrow it down to the particular components that are heat-sensitive. The small heat gun works well for this.
Another way to check for the same symptoms (i.e., temperature sensitivity) is to use freeze spray. You can target individual components then. With the spray, you will note that the vast majority of components are not sensitive. If you find some that are, and those “mute” the audio output of the receiver, consider changing them.
Sometimes temperature extremes can reveal bad contacts, such as edge connectors. Another technique — and I can’t emphasize caution enough when it comes to this — is to use a rubber mallet to gently tap on a device in order to reveal marginal contacts. Seriously, don’t bang on a piece of gear; just use the mallet to give it some gentle shocks. See if any of these shocks reveal the same symptom you are looking for (in this case loss of audio). If so, open the receiver, and manipulate each and every connection inside of the device to see if they are solid or if they reveal a problem.
Troubleshooting is becoming a lost art, I’m afraid. The playing field is different today then it was even 10 years ago. Rare is the occasion that we must get down to the component level.
Still, the techniques I’ve discussed are valid, even in the era of board swaps.